


 検索
よくあるご質問
質問
What Settings do I Need After Installing a Printer Driver? (FAQ No.01928)
回答
When you install a printer driver, configure the driver settings to match the options installed on the MFP, such as paper trays and a finisher. Normally, these settings are configured automatically during printer driver installation to match the optional devices installed on the MFP. When you uncheck [Auto Configuration] or change the settings, follow the procedure below.
The following procedure uses BP-70C26.
You can configure the settings automatically or manually.
If the machine is connected to the network via IPv6, or if automatic configuration fails, configure the settings manually.
Steps for Automatic Setting
1. Open [Printer Properties].
2. Show configuration.
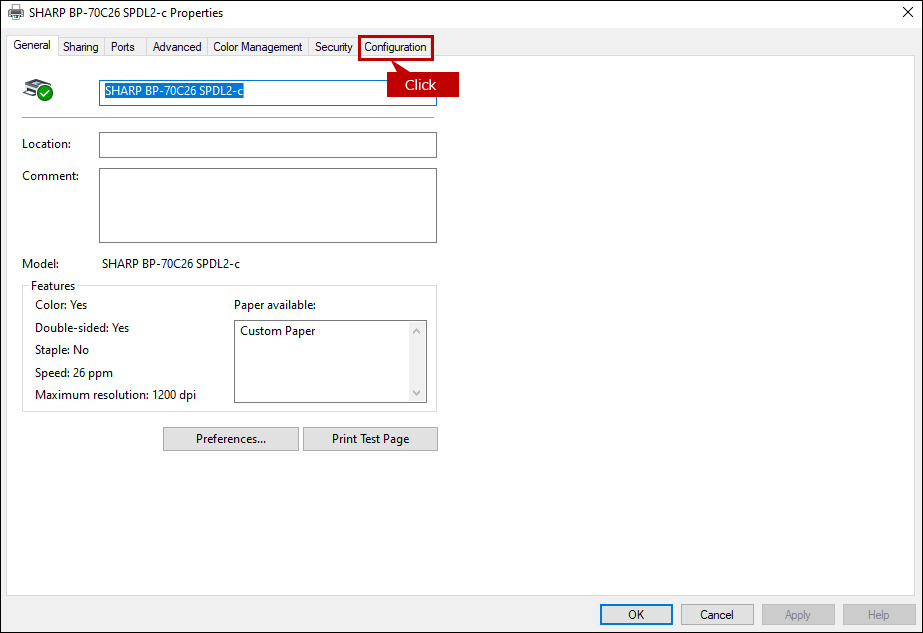
Click the [Configuration] tab.
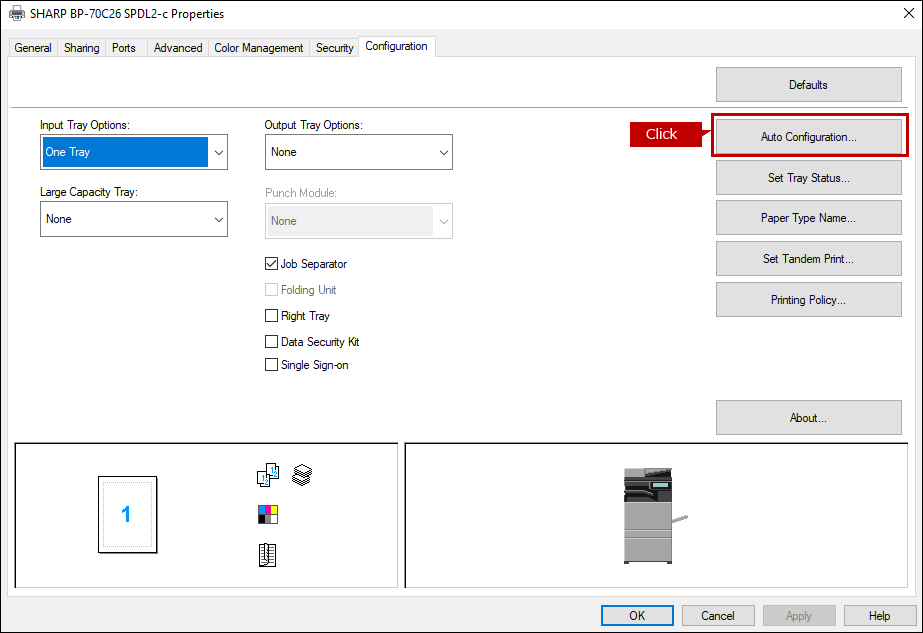
3. Start Auto Configuration.
When you click the [Auto Configuration] button, the setting update begins automatically.
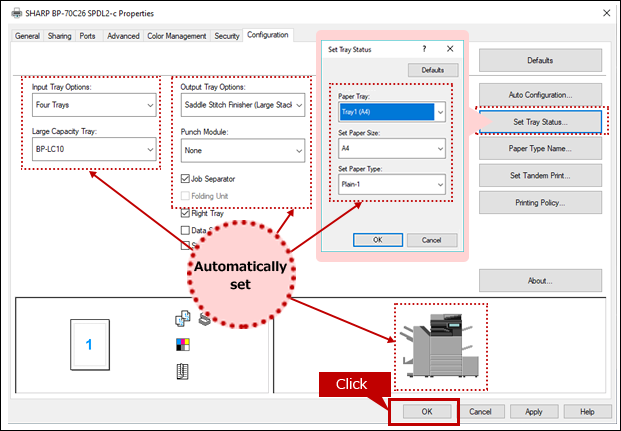
4. Update machine image (configuration).
Verify that each item has been updated automatically and then click the [OK] button.
Steps for Manual Setting
1. Open [Printer Properties].
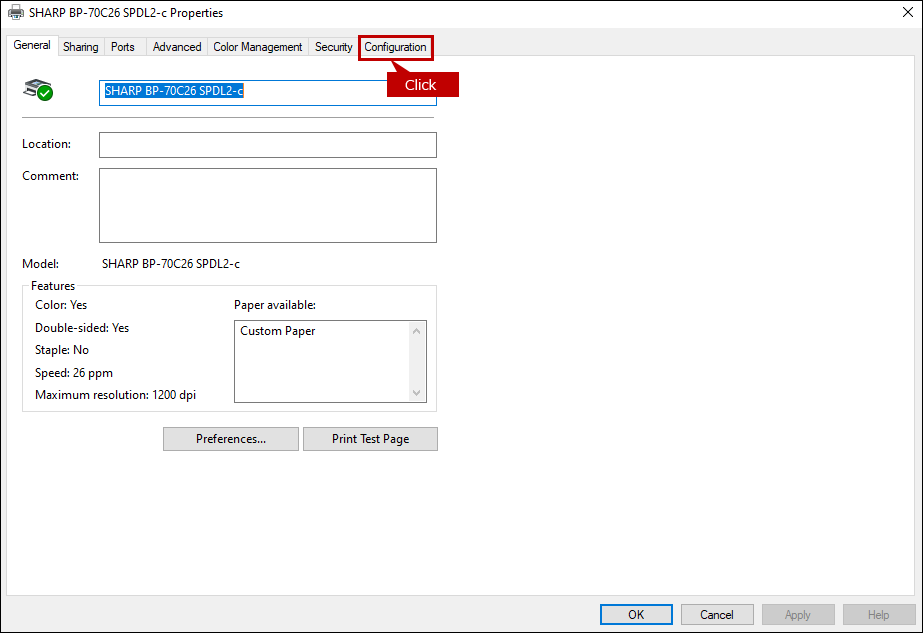
2. Show configuration.
Click the [Configuration] tab.
3. Configure the settings for paper input and/or output options.
Before configuring the paper input and output options, check which options are installed on the MFP.
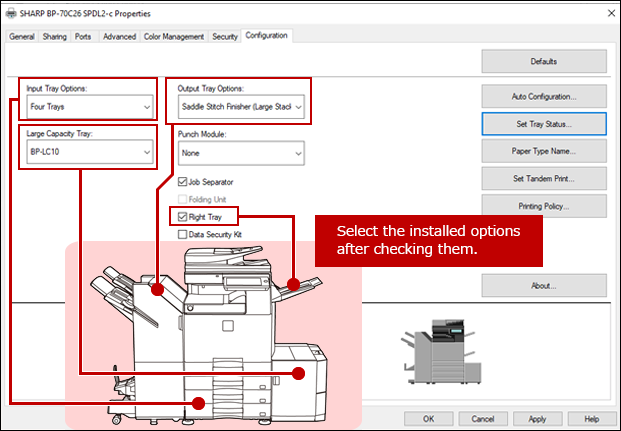
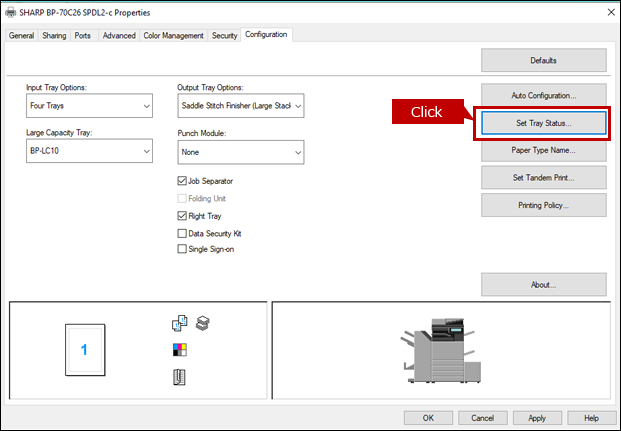
4. Set the tray(s).
Click the [Set Tray Status] button.
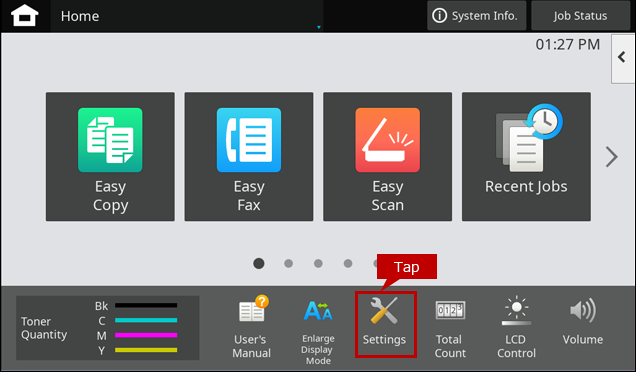
5. Check the tray settings on the touch panel.
Check the tray settings on the operation panel.
Tap [Settings] on the operation panel.
◎ Reference Information
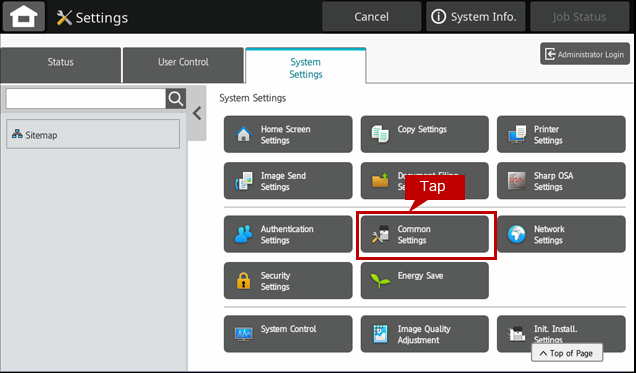
Display language can be changed on the operation panel and web page.6. Open [Common Settings].
Tap [Common Settings].
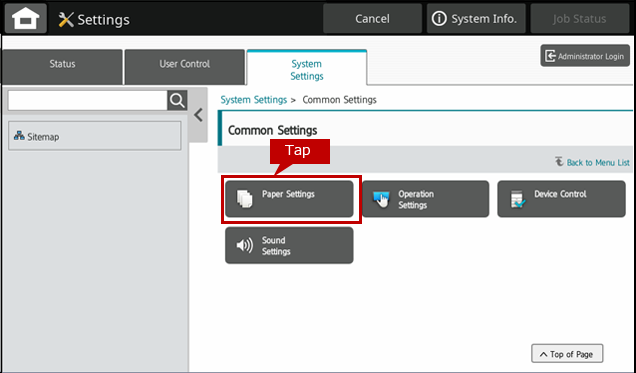
7. Open [Paper Settings].
Tap [Paper Settings].
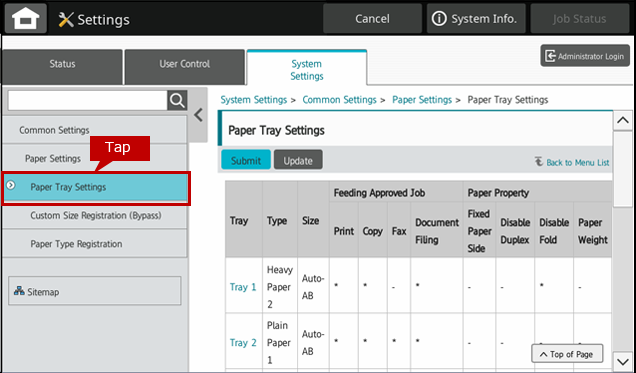
8. Open [Paper Tray Settings].
Tap [Paper Tray Settings].
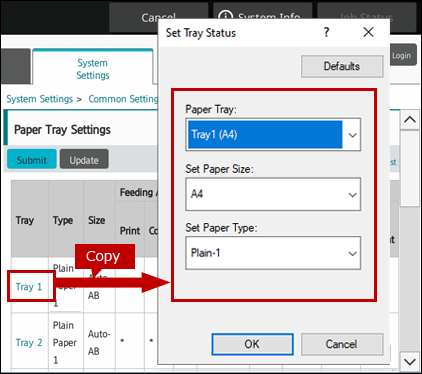
9. Register the settings to [Tray Settings].
Look up all setting information and copy the settings to the tray settings of [Printer Properties].
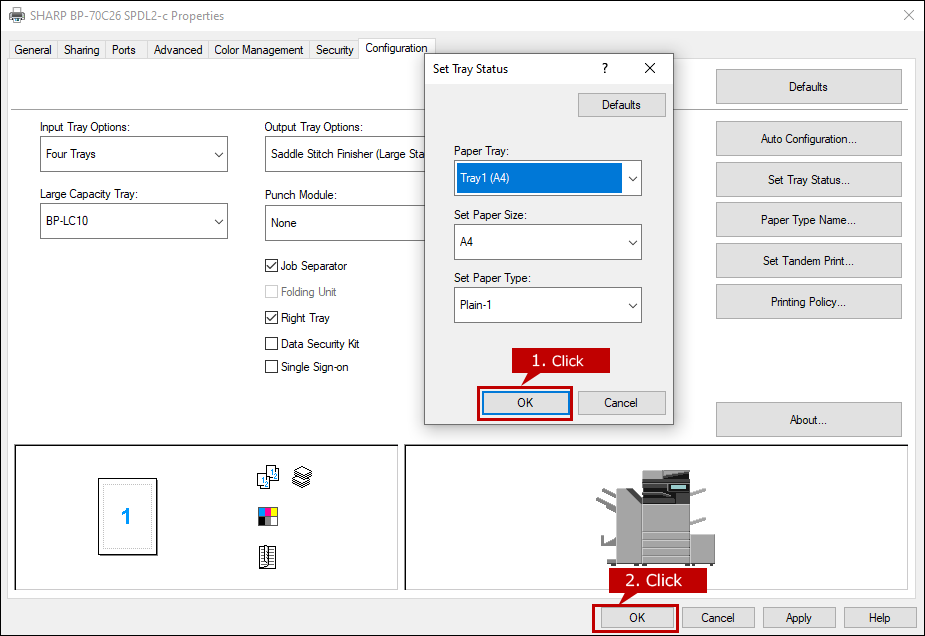
10. Complete the setup.
Click the [OK] button to complete the setup.
関連キーワード
FAQJPID_01928 / Printer Driver / Driver / Install / Set up / Settings / Configuration / Tray / Auto Set / Manual setting / Windows
各製品のよくあるご質問トップに戻る
BP-40C26 / BP-40C36 / BP-50C26 / BP-50C31 / BP-50C36 / BP-50C45 / BP-50C55 / BP-50C65 / BP-50M26 / BP-50M31 / BP-50M36 / BP-50M45 / BP-50M55 / BP-50M65 / BP-51C26 / BP-51C31 / BP-51C36 / BP-51C45 / BP-51C55 / BP-51C65 / BP-51M26 / BP-51M31 / BP-51M36 / BP-51M45 / BP-51M55 / BP-51M65 / BP-55C26 / BP-56C26 / BP-60C26 / BP-60C31 / BP-60C36 / BP-60C45 / BP-61C31 / BP-61C36 / BP-61C45 / BP-70C26 / BP-70C31 / BP-70C36 / BP-70C45 / BP-70C55 / BP-70C65 / BP-70M31 / BP-70M36 / BP-70M45 / BP-70M55 / BP-70M65 / BP-71C31 / BP-71C36 / BP-71C45 / BP-71C55 / BP-71C65 / BP-71M31 / BP-71M36 / BP-71M45 / BP-71M55 / BP-71M65 / BP-80C70 / BP-80C80更新日:2026年11月9日