SHARP

Language

ENTERING DESTINATIONS

This section explains how to enter a destination from the initial screen of easy mode.
EASY MODE

ENTERING A DESTINATION NUMBER USING THE NUMERIC KEYS

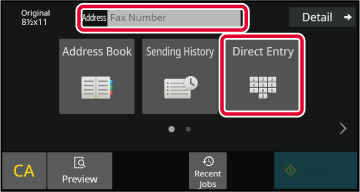
Tap the [Direct Entry] key or [Fax Number] to enter the destination fax number.

If you want to specify multiple destinations, tap and enter the next fax number.
If you enter an incorrect number, tap the [C] key to delete the number and re-enter.

Entering a Pause Between Digits of the Number

Enter a pause after the number used to dial out from a PBX (for example, after "0"), or after the country code when dialing an international number.

Tap the [Pause] key.

A hyphen "-" is entered when the [Pause] key is tapped once.
If you want to enter a pause between digits of the number:
Enter a pause after the number used to dial out from a PBX (for example, after "0"), or after the country code when dialing an international number.
The [Pause] key appears on the numeric keys when the destination fax number is entered.
A hyphen "-" is entered when the [Pause] key is tapped once.
To set the length of pause:
In "Settings", select [System Settings] → [Image Send Settings] → [Fax Settings] → [Default Settings] → [Pause Time Setting].

RETRIEVING A DESTINATION FROM AN ADDRESS BOOK

A destination fax number is retrieved by simply tapping the one-touch key of that destination on the address book screen. (One-touch dialing)

It is also possible to store multiple fax numbers in a one-touch key, allowing you to retrieve all the numbers by simply tapping the key. This dialing method is convenient when you wish to send a fax to (or poll) multiple fax destinations.
When destinations of other scan modes are stored in addition to fax destinations, an icon indicating the mode appears together with the name of the destination in each one-touch key.

Fax

Scan to E-mail

Internet Fax (Direct SMTP)

Scan to FTP

Scan to Network Folder

Scan to Desktop

Group key with multiple destinations

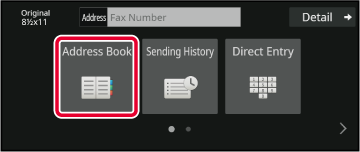
Tap the [Address Book] key.

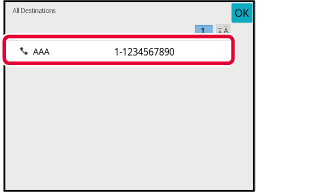
Tap a one-touch key of contact or group that includes the fax destination.
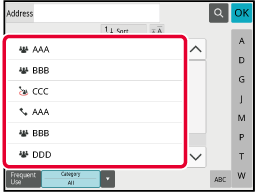
  • The destinations displayed on the list can be narrowed with frequent use, categories, indexes, and keywords. (In normal mode, you can narrow down the destinations by job type.)
  • Tapping [Sort] allows you to change the order of destinations displayed in the list.
  • When adding a destination, tap another one-touch key.
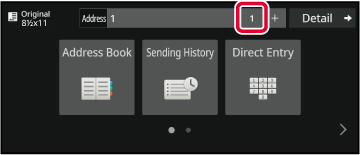
  • If two or more destinations are selected or specified, the total number of addresses appears next to address.
  • Even if only a single destination is selected, the number of addresses appears when the destination is a contact or group in which multiple addresses are stored.
  • For more information, see " ADDRESS BOOK".
  • If you select an incorrect destination:
  • Tap the key again to cancel the selection.
  • To cancel a selected destination
  • Select the destination you want to cancel in the destination list screen, and tap the [Delete] key.
  • To select a destination from the transmission log, tap the [Sending History] key.
  • USING A TRANSMISSION LOG TO RESEND
  • To check the entered destinations, tap the [Address Review] key.
  • THE SELECTED DESTINATIONS
  • The destination for transmission can be selected by tapping a stored destination.
  • If an address that you do not have permission to use is included in the addresses, a message will appear when you press the [Start] key. To send only to the permitted addresses, press the [OK] key and then the [Enter for send] key.

In normal mode
  • Tap the one-touch key, and then tap [Display Registered Information] on the action panel to display the detailed information.
  • To retrieve a destination by using a search number, tap [Call Search Number] on the action panel.
  • USING A TRANSMISSION LOG TO RESEND
  • To retrieve a destination from a global address book, tap [Global Address Search] on the action panel.
RETRIEVING A DESTINATION FROM A GLOBAL ADDRESS BOOK
To send to an address in other than the current mode
In "Settings (administrator)", remove the checkmark from [System Settings] → [Image Send Settings] → [Common Settings] → [Condition Settings] → [Address Book Default Selection] → [Apply Addresses of Sending Modes Only].

THE SELECTED DESTINATIONS

When multiple destinations have been selected, you can display and check the destinations. You can also delete a destination (cancel selection of the destination) if necessary.

Tap the [All Destinations] key.
Confirm the destination.

After the confirmation is completed, tap .
  • To confirm detailed information such as the type or name of the specified destination, tap the one-touch key of the target destination, and then tap the [Info.] key.
  • If an address that you do not have permission to use is included, a prohibition mark will appear on the address.

DELETING SPECIFIED DESTINATIONS

Select the address and tap the [Delete] key.
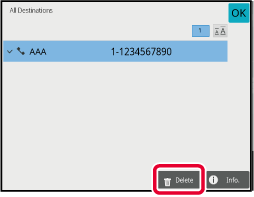
If you placed the original on the document glass and tapped the [Start] key, you cannot delete an address when changing settings.

USING A SEARCH NUMBER TO RETRIEVE A DESTINATION

The search number can be used to specify a destination stored in an address book.

Tap the [Detail] key to change normal mode.

EASY MODE

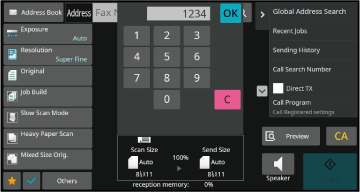
Tap [Call Search Number] on the action panel.
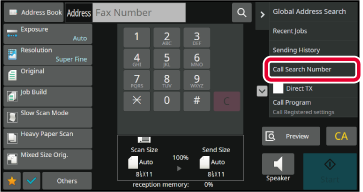
Enter a search number (4 digits) using the numeric keys and tap .

When the search number is entered, the stored address is retrieved and specified as a destination.
If an incorrect search number is entered:
Tap the [C] key to clear the number and enter the correct number.
  • The search number is programmed when the destination is stored in the address book.
  • If you do not know the search number, tap [Print Individual List] on the action panel to print and check the address list.
  • When entering search numbers such as "0001" and "0011", "0" can be omitted. For example to enter "0001", enter "1” and tap .

RETRIEVING A DESTINATION FROM A GLOBAL ADDRESS BOOK

If an LDAP server is configured in the setting mode (Web version), you can search for the desired destination in the global address book and obtain the fax number when performing a fax transmission.
You can also add a retrieved address to the address book. However, addresses of the FTP/Desktop transmission cannot be stored from the machine.

Even if "Verify Signature of Server Certificate of the Other Party" is enabled in the system settings, when "Global Address Search" is performed when the search destination is an LDAP server, the server certificate of the destination is not validated.

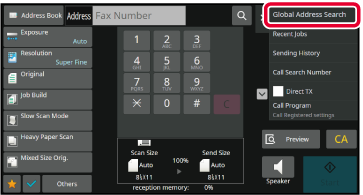
In the base screen or address book screen, tap [Global Address Search] on the action panel.
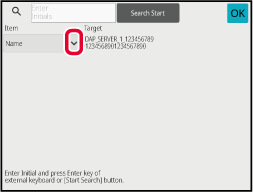
Tap [Target] and tap the LDAP server to be used.

  • If an authentication screen for the LDAP server appears, enter your user name and password.
  • If only one LDAP server has been stored, it is not necessary to take step 2. In this case, start from step 3.
  • After the settings are completed, tap .

Tap of [Item], and select an item to be searched from [Name/Address].
How to search
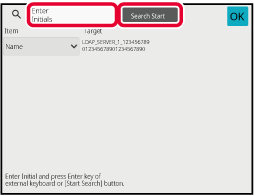
Enter the search characters (maximum of 64 characters). The system will look for names starting with the entered letters. An asterisk can be used as follows:
XXX or XXX : Names containing the search characters will be searched
XXX : Names beginning with "XXX"
XXX : Names that end with "XXX"
AA XX : Names that start with "AA" and end with "XX".

Enter a keyword and tap the [Search Start] key.

When you tap the keyword entry box, the soft keyboard appears.
The search results will appear after a brief interval.
  • If no destination is found:
  • Tap the [Search Again] key.
  • To continuously add other destination:
  • Tap the destination.
To check the destination information:
Tap the one-touch key of the target destination, and then tap the [Info.] key. Tap to close the address information screen.
When you select the destination and tap the [New Registration with Address Book] on the action panel, the destination can be stored in the address book. This is convenient if you have entered a destination directly.

RETRIEVING A DESTINATION FROM A MOBILE ADDRESS BOOK

If the machine and mobile device are connected by Bluetooth, you can retrieve a destination from the mobile address book.
Destinations for fax transmission and e-mail transmission can be retrieved.

  • The called address book is not saved in this machine.
  • The maximum number of addresses that can be read from the mobile address book is 2000.
  • For more information about the operation of mobile devices, please refer to the operation manual/help of the mobile device.
    To use this function
    Enable "Settings (administrator)" → [Network Settings] → [Bluetooth Setting] → [Bluetooth] to pair the machine and mobile device.

Tap the [Mobile Address Book] key.

In Easy mode
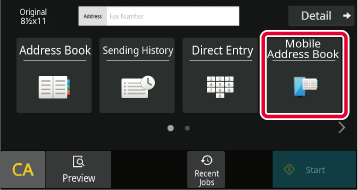
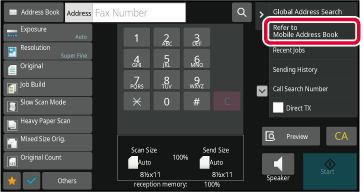
In the base screen or address book screen, tap [Refer to Mobile Address Book] on the action panel.

In Normal mode
Operate the mobile device to be connected to pair it with the machine.

Device name of the machine is displayed on the screen.
When pairing with a mobile device that has been paired with this machine before, delete the information of this machine stored in the mobile device.
To set a device name to this machine
Configure in "Settings (administrator)" → [System Settings] → [Network Settings] → [Network Name Setting] → [Device Name].
The device name must be in 7 or less double-byte characters, or 15 or less single-byte characters.

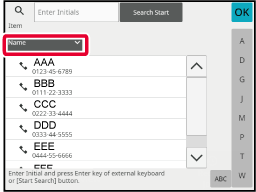
Tap ( ) of [Name], and select an item to be searched from [Initial], [Name] or [Address].
Enter a keyword and tap the [Search Start] key.

When you tap the keyword entry box, the soft keyboard appears.
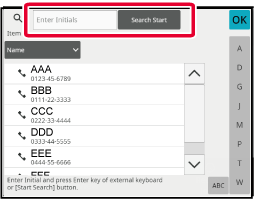
The search results will appear after a brief interval.
  • If no destination is found:
  • Tap the [Search Again] key to add more search letters.
  • To continuously add other destination.
  • Tap the destination.

USING A TRANSMISSION LOG TO RESEND

Select a destination from a transmission log and resend the data.
The destinations of the most recent 50 transmissions by fax, Scan to E-mail, and/or Internet fax are stored. One of these can be selected to resend to that destination. The destinations of the FTP/Desktop transmission and Scan to Network Folder are also shown in the transmission log.
In normal mode, you can also add an address in a transmission history to the address book. This is a convenient way to store the fax numbers and addresses of destinations that were manually entered. However, addresses of the Network Folder transmission cannot be stored from the machine.

  • If numeric keys were tapped during the previous transmission, the number may not be redialed correctly.
  • The fax addresses below are not stored as addresses for which resend is possible.
    • One-touch key for a contact in which multiple destinations are stored.
    • Group destinations
    • Broadcasting destinations

Tap the [Sending History] key.

In Easy mode
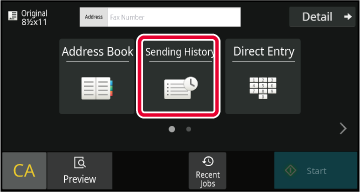
In the base screen or address book screen, tap [Sending History] on the action panel.

In Normal mode
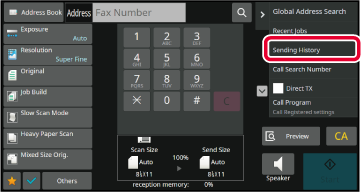
Tap the key of the fax destination that you wish to redial.

The last 50 addresses used for transmission are displayed.
To cancel the resend setting:
Tap the highlighted key.
In normal mode
  • To add an address to the address book, select the address and tap [New Registration with Address Book] or [Additional Registration with Address Book] on the action panel.
  • You can select an address and tap [Delete the Selected History] or [Delete All Histories] on the action panel to delete one or all histories.

SENDING BY CHAIN DIALING

Number sequences entered using the numeric keys and/or one-touch keys can be linked together with pauses and dialed as a single number. For example when dialing an international number, tap the [Pause] key between the identification number of an international telephone service company (e.g., "001") and the country code (e.g., "81" for Japan) to insert a pause for smoother line connection.
The time (in seconds) set in "Settings", select [System Settings] → [Image Send Settings] → [Fax Settings] → [Default Settings] → [Pause Time Setting] defines the length of pause. Set a value from 1 to 15 seconds in increments of 1 second. On the screen, a hyphen "-" indicates a pause. If two seconds are set in [Pause Time Setting], tapping the [Pause] key three times enters pauses for 6 seconds.

Example: Using chain dialing to dial an international number
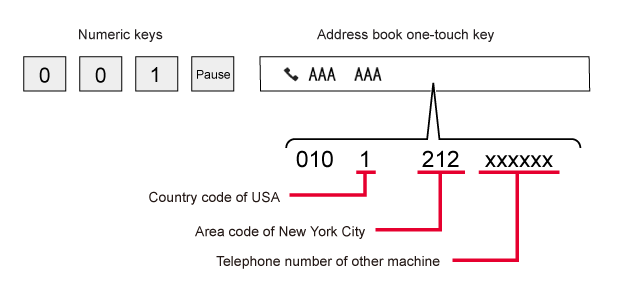
  • Addresses that can be selected are addresses that only have one fax address saved.
  • After entering the number with the numeric keys, tap the [Pause] key to enter the next number with the numeric keys, or tap the [Chain Dial] key on the action panel to select an address from the address book.
  • After selecting the address from the address book, select [Chain Dial Combine with Direct Input] on the action panel to enter the next number with the numeric keys, or [Chain Dial Combine with Address Book] to select an address from the address book.

Language

Version 03a / bp70m90_usr_03a_us

↑Top of page