RECEIVING A FAX
This section explains how to enter a destination from
the initial screen of easy mode.
EASY MODE
RECEIVING A FAX AUTOMATICALLY
When the reception mode is set to "Auto Reception", the machine will
receive and print faxes automatically.
- When fax reception
is in progress, it is possible to reserve a transmission by performing
the transmission in memory transmission mode.
FAX TRANSMISSION METHODS
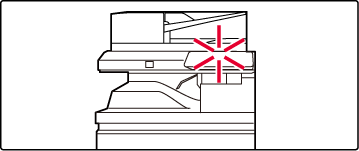
- The information indicator
blinks in white from the start of fax reception until printing is
completed.
- To print received faxes,
make sure that the required paper is loaded into the machine's paper
trays. It is not necessary to load 8-1/2" x 11" (A4) paper and 5-1/2"
x 8-1/2" (B5) paper in both the vertical (
 ) and horizontal (
 ) orientations. Differences in orientation
are automatically adjusted when faxes are received.
 When a
fax smaller than 8-1/2" x 11" (A4) size is received, the size of
the paper used for printing will vary depending on the orientation
(vertical or horizontal) in which the sender placed the original.
- If a print job such as
the copy or printer function has already been executed when printing
the received data, the first reserved job is printed before the
received data.
- Received faxes will not
be printed when the machine cannot print due to an error condition
such as out of paper, out of toner, or a paper misfeed. The faxes
will be printed automatically when the error condition is cleared.
(If the paper has run out, add paper and tap
 on the touch panel.)
- You can check current
fax reception mode in the system area at the top of the screen.
- To switch between
auto reception and manual reception modes:
Select
[System Settings] in "Settings (administrator)" → [Image Send Settings] → [Fax Data
Receive/Forward (Manual)]
→ [Fax Settings] → [Receive Settings].
- Distinctive Ring Detection
If multiple
telephone numbers have been assigned to your telephone line, the
number called can be identified by its ringing pattern. By using
one number for voice calls and another number for faxes, you can
tell which type of call you are receiving by the ringing pattern.
You can set your machine to automatically receive faxes when your
fax number is called by setting the pattern that corresponds to
your fax number.
In "Settings (administrator)", select [System Settings] → [Image Send Settings]
→ [Fax Settings] → [Default Settings]→ [Distinctive Ring Detection].
The machine rings and fax reception begins automatically.
When reception begins, the information indicator blinks
in white.
A beep sounds when reception ends.
The faxes are printed automatically.
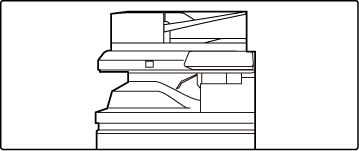
When printing ends, the Information indicator turns off.
How to check the fax reception mode
You can check current fax reception mode in the system
area at the top of the screen.
RECEIVING A FAX MANUALLY
A fax can be received manually using the touch panel (manually).
To
switch between auto reception and manual reception modes:
Select [System Settings] in "Settings (administrator)" → [Image Send Settings]
→ [Fax Data Receive/Forward (Manual)] → [Fax Settings] → [Receive Settings].
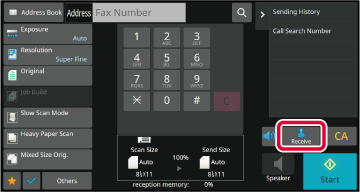
When the machine rings, tap the [Detail] key to
change to normal mode, and tap the [Speaker] key.
When the [Speaker] key is tapped, the [Receive]
and

appears.
EASY MODE
- To adjust the speaker
volume, tap the
 key and adjust with the slider or
 keys.
keys.
- If the received fax data
remains unprinted, it will cause the fax memory to fill up, which
may prevent some faxes from being received. When using this function,
you should print the received data as soon as possible without leaving
it in the fax memory.
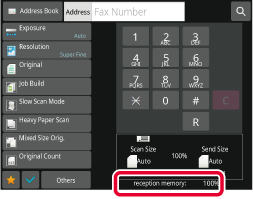
You can
view the remaining fax memory capacity on the fax mode base screen.
Tap the [Receive] key to receive a fax.
When printing ends, the Information indicator turns off.
 ) and horizontal (
 ) orientations. Differences in orientation
are automatically adjusted when faxes are received.
 on the touch panel.)


 appears.
 key and adjust with the slider or
 keys.
keys.
