Tips
How to install the Printer Driver Easy UI Plug-in (Tips No.01408)
What is an Easy UI Plug-in plugin?
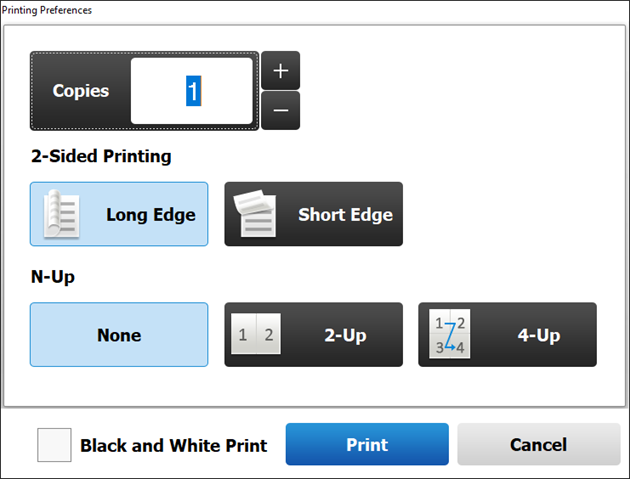
After installing the Easy UI Plug-in, the print settings of the PCL6 driver will change to a simple and easy to understand screen. The relatively frequently used setting items are displayed in an easy-to-understand menu, making printing operations easy.
* This system is a plug-in, so install the PCL6 driver in advance.
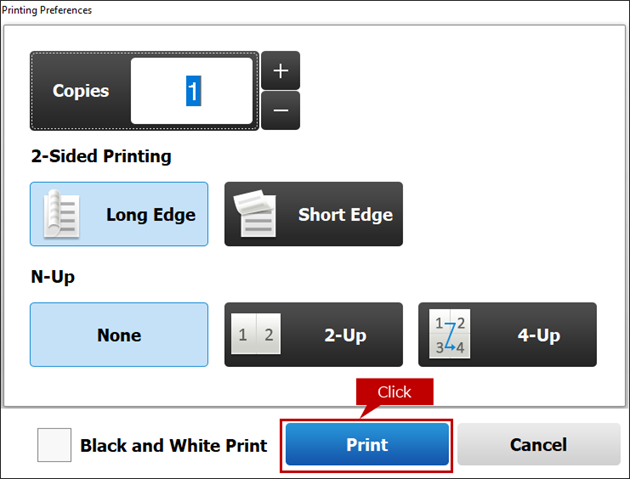
Ex. Easy UI Plug-in Printing Preferences screen
Procedure
We recommend downloading and using the latest version of the driver from our website.
1. Select the utility software to install.
Enter the Product Name and Country/Region on the Driver/Software Downloads page.
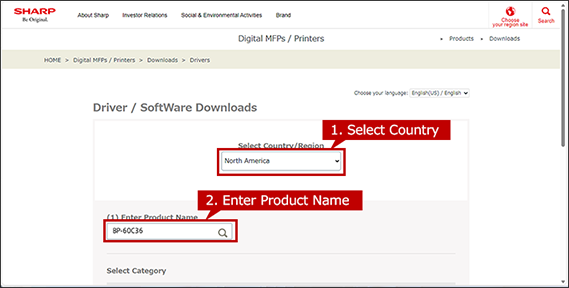
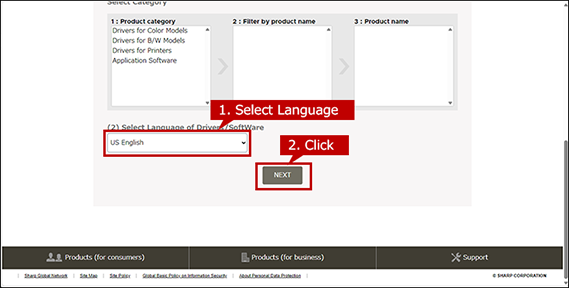
Next, select your language of Drivers/Software and click [NEXT].
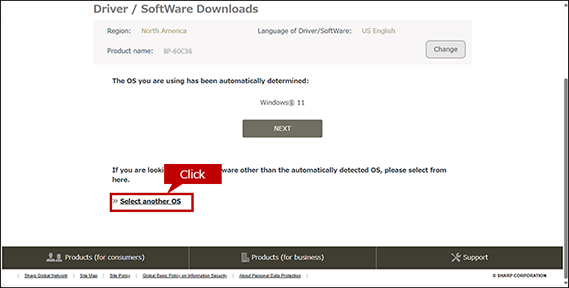
2. Select Operation System
The OS of your computer will be automatically determined, so click [NEXT].
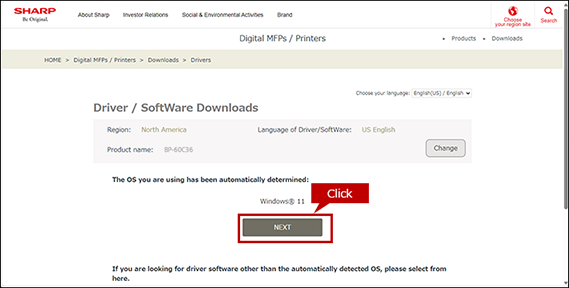
*If you want to select another OS, click [Select another OS].
The automatically detected OS for server may differ from the actual OS.
If the detected OS is different from the actual OS, click [Select another OS] and select the OS of your PC from the list box.
When the OS cannot be detected automatically.
When a list box appears, select the OS of your PC from the list box.
How to find the OS information of your PC.
To check the OS information of your PC, refer to "What is my OS ? How do I know the bit of my PC ?"
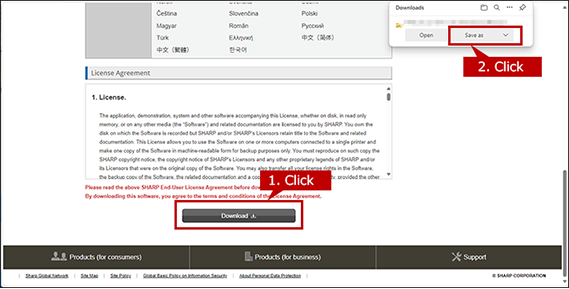
3. Download and Install a Printer Driver.
Click the [Download] button and click the [Save as] button on the opened window. If you saved the file, double-click it.
Depending on your PC environment, sometime the file is automatically saved without opening a window.
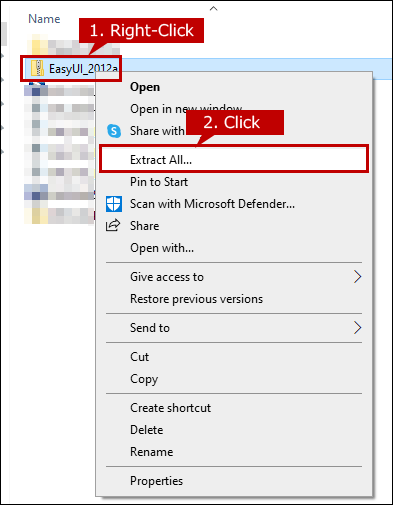
4. Unzip the saved utility software.
The utility software is compressed, so extract it.
5. Perform the installation.
When you open the unzipped folder, the setup file appears. Double-click setup.exe for the installer.
* If the extension is hidden, multiple files named setup appears. Double-click the file with the icon shown below.

An Installation requires an administrator privileges.
- - Right-click the stored file and click [Run as an administrator] on the displayed menu to execute the installation.
- - Enter the admin password if necessary.
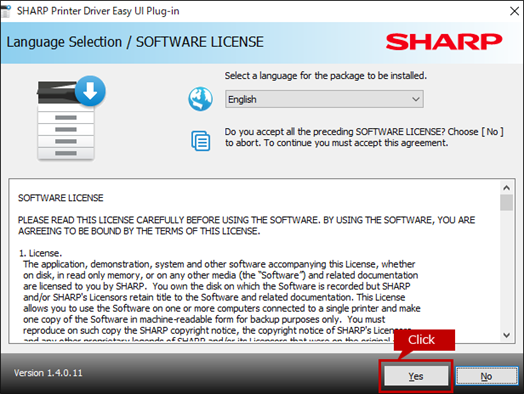
6. Check the contents of the software license and go to the next step.
Check the displayed "Software License" and click the [Yes] button.
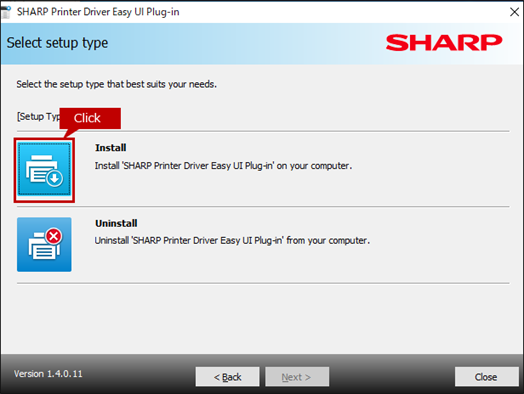
7. Select a setup type.
Click the [Install] icon.
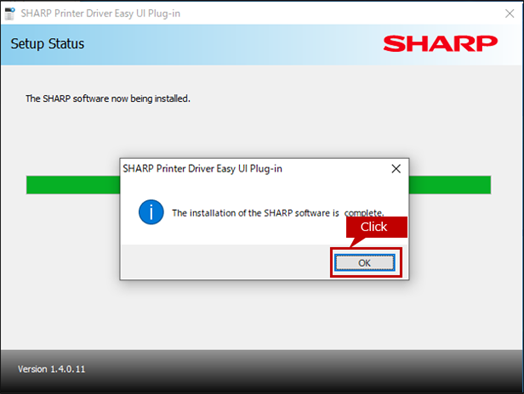
8. Complete the installation.
The message "The installation of the SHARP software is complete." appears. Click the [OK] button.
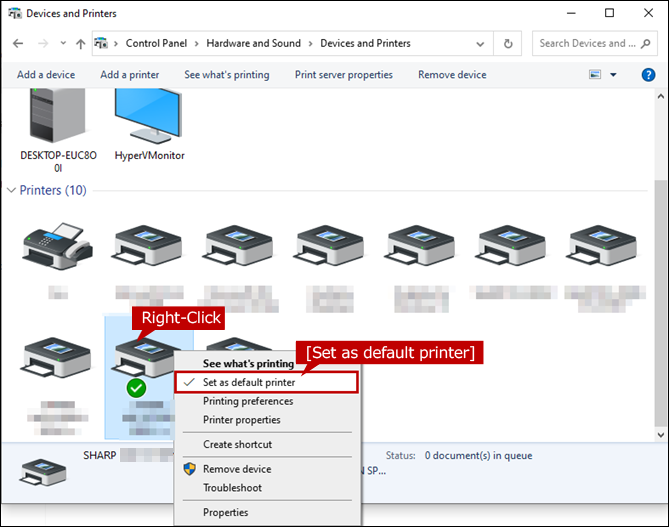
9. Open the device and printer view.
10. Set a MFP the default printer.
Right-click the printer (MFP) to use, and click [Set as default printer] in the displayed menu.
* The Easy UI Plug-in cannot be used unless it is set as the default printer.
When printing data from an application after the installation
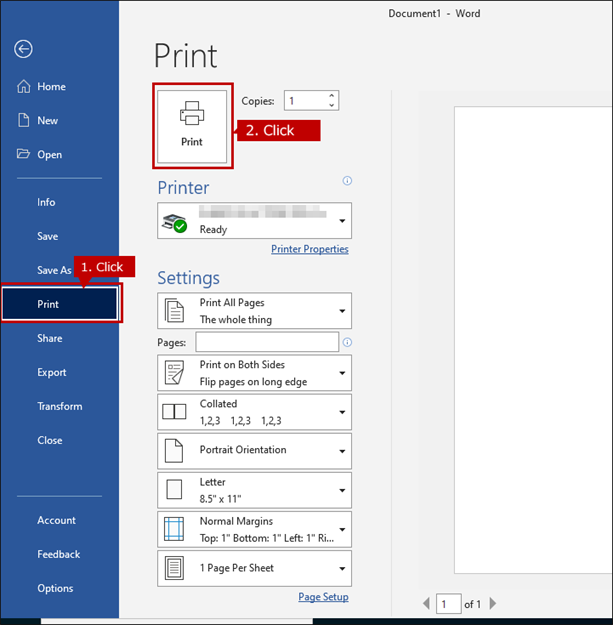
1. Perform printing
Open any application and click [Print] from the File menu.The print screen appears. Click [Print] to start printing.
Ex.Microsoft Word 2013
Note
- The Easy UI Plug-in cannot be used unless it is set as the default printer.
2. Start printing
The Printing Preferences -Easy UI screen appears. After setting each item, click [Print].
Related Content
 How to uninstall the Easy UI Plug-in
- Reference : How to uninstall the Printer driver Easy UI Plug-in