BASIC SCANNING PROCEDURE
You can install the scanner driver on your computer
and use a TWAIN* compliant application
to scan an image using your computer.
Scanning from your computer is most useful for scanning a
single original such as a photo, particularly when you want to adjust
scan settings as you scan. By contrast, scanning at the machine
is most useful for continuous scanning of multiple originals.
An interface standard used for scanners
and other image input devices. When the scanner driver is installed
on your computer, you can use any TWAIN-compliant application to
scan an image.
- For the procedures for installing
the scanner driver and configuring settings, see the Software Setup
Guide.
- This function cannot be used when it has
been disabled using "Disable Scan Function" in the system settings (administrator).
- The procedures for selecting the scanner
driver and starting scanning vary depending on the TWAIN-compliant application.
For more information, see the manual for the application or Help.
- When a large image is scanned at high resolution,
the amount of data will be very large and scanning will take a long
time. Be sure to select appropriate scan settings for the original
(text, photo, etc.).
As an example, the procedure for scanning from the "Sharpdesk"
application is explained below.
[At
the machine]
Prohibit
PC Scan:
Prohibit sending when a fax number or address is manually
entered To enable the hold setting for received data print
In "Settings (administrator)", select [System Settings] →
[Image Send Settings] → [Common Settings] → [Enable/Disable Settings] → [Settings
to Disable Transmission] → [Disabling of PC Scan].
Prohibit PC Scan.
Place the original.
Place the original face up in the document feeder tray,
or face down on the document glass.
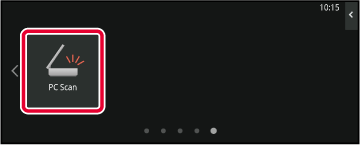
Tap the [PC Scan] mode icon to switch to PC Scan
mode.
If the [PC Scan] mode icon does not appear, tap

to move the screen.
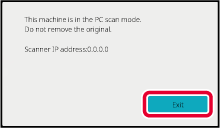
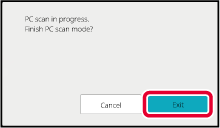
When PC scan mode is selected, only the [Exit]
key displayed in the touch panel can be used on the machine; no
other keys can be used.
[At
your computer]
Start the TWAIN-compliant application on your computer
and select [SHARP MFP TWAIN K] in the application's scanner selection.
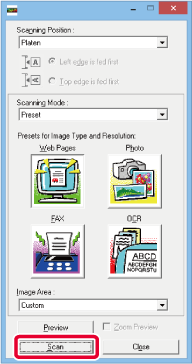
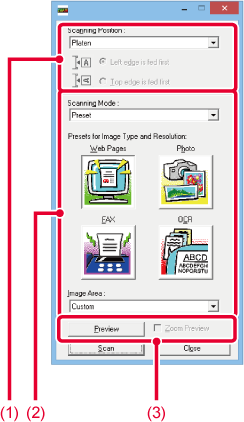
Preview the image.
- Select the location where the original is placed.
"Scanning Position"
menu:
- If the original is
a one-sided original and is placed in the document feeder tray,
select [SPF(Simplex)].
- If the original is
a 2-sided original and is placed in the document feeder tray, select
[SPF(Duplex - Book)] or [SPF(Duplex - Tablet)] depending on whether
the original is a book-style or tablet-style original. In addition,
select [Left edge is fed first] or [Top edge is fed first] depending
on the orientation of the original.
- Select scan settings.
"Scanning Mode" menu:
Switch between the "Preset" screen and the "Custom Settings"
screen. In the "Preset" screen, select "Web Pages", "Photo", "FAX"
or "OCR" depending on the original type and your scanning purpose.
If you wish to change the initial settings of any of
the four buttons or select the resolution or other advanced settings,
change to the "Custom Settings" screen.
"Image Area" menu:
Select the scan area. If "Auto" is selected, the original size
detected by the machine will be scanned. You can also set the scanning
area in the preview window with your mouse.
- Click the [Preview] button.
The preview image will appear in the scanner driver.
If you are not satisfied with the preview image, repeat (2)
and (3).
If the [Zoom Preview] checkbox is selected before the [Preview]
button is clicked, the selected area will be enlarged in the preview
window. If the checkmark is removed, the preview image will return
to normal. Note that if SPF is selected in the "Scanning Position"
menu, the [Zoom Preview] function cannot be used.
- For
further information on the scan settings, click the
 button in the preview image screen of
step 7 to open scanner driver Help.
button in the preview image screen of
step 7 to open scanner driver Help.
- If the [Preview] button is clicked when
scanning from the document feeder tray, only one original page will
be scanned for the preview image. If you wish to include that original
in the scan, return it to the document feeder tray.
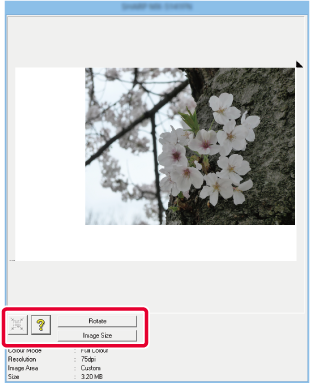
Select scanning settings while viewing the image.
[Rotate] button:Each time this button is clicked, the preview image rotates 90
degrees. This lets you change the orientation of the image without
picking up and placing the original again. The image file will be
created using the orientation that appears in the preview window.
[Image Size] button:Click this button to specify the scan area by entering numerical
values. Pixels, mm, or inches can be selected for the units of the
numerical values. If a scanning area has already been specified,
the entered numbers will change the area relative to the top left
corner of the specified area.
 button:
When a preview image is displayed and a scanning area
is not specified, you can click the button to automatically set the
scanning area to the entire preview image.
- For
further information on the scan settings, click
button to open scanner driver Help.
- If the originals are placed in the document
feeder tray, only the top page will be previewed. The top page will
be delivered to the original exit tray. Be sure to return the previewed
page to the document feeder tray before previewing again or scanning.
Click the [Scan] button.
Scanning begins. The image appears in your application.
Assign a file name to the scanned image and save it as appropriate
in the software application you are using.
[At the machine]
Tap the [Exit] key.
Tap the [Finish] key.
.png)