To ensure that the machine continues to provide top quality performance, periodically
clean the machine.
Warning
Do not use a flammable spray to clean the machine. If gas from the spray comes in contact with hot electrical components or the fusing unit inside the machine, fire or electrical shock may result.Caution
When the laser unit inside the machine becomes dirty, line patterns (colored lines)
may form in the printed image.
Identifying lines (colored lines) caused by a dirty laser unit
Open the front cover.
Open while pressing the convex parts on both sides.
Remove the toner collection container.
Spread newspaper or something similar in advance where you will place the toner collection container.
Caution
Take out the cleaning tool for the laser unit.
The cleaning tool is attached to the front cover.

Clean the laser unit.


Caution
Do not touch the internal cords or connectors.Repeat steps 4 to clean all holes (4 holes) in the laser unit.
The laser unit is cleaned in four locations, including the location cleaned in step 4. Clean all holes.
Replace the cleaning tool.


Install a toner collection container.


Close the front cover.
Hold both sides and close.
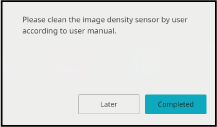
When the message "Please clean the image density sensor by user according to user
manual." appears, clean the image density sensor using the following steps.
Caution
Tap the "Later" key to print, however, if you continue to use the printer with an image dirty density sensor, the printed image may be smudged.Turn off the machine.
Press the [Power] button to turn off the machine. For details on how to turn off the power, see "TURNING OFF THE POWER."Open the front cover.
Open the front cover while pressing the convex parts on both sides.Tilt the toner collection container to the front.
Press the release buttons on the sides of the toner collection container, push the toner collection container down until the toner collection container stops.
Caution
Do not touch the internal cords or connectors.Push the toner collection container into the machine.
Push in until you hear a "click" sound indicating that the left and right locks are engaged.
Close the front cover.
Hold both sides and close.Turn on the machine.
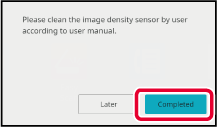
Press the [Power] button to turn on the machine. For details on how to turn on the power, see "TURNING ON THE POWER."Tap the [Completed] key.
Caution
If paper misfeeds frequently occur when feeding envelopes or heavy paper through the
bypass tray, wipe the surface of the feed roller with a clean soft cloth moistened
with water or a neutral detergent.

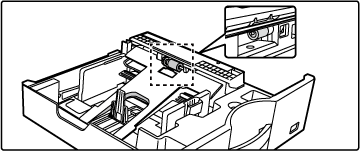
If the paper in tray 1 frequently misfeeds, press down the center of the pressure
plate until it locks, and wipe the surface of the feed roller with a clean, soft cloth
moistened with water.
Pull out the paper tray 1.
Hold the tray with both hands and slowly pull out and up at a slight angle.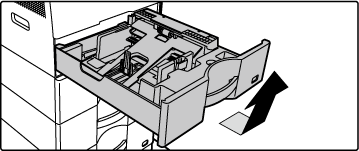
Clean the feed roller.
Version 02a / bpc545pw_usr_02a_us
