SELECTING
THE SIZE OF THE ORIGINAL
When the original size is a non-standard size or is
not detected correctly, manually specify the original size.
- Set the orientation and size of the
original before scanning the original.
- The original size is automatically detected
by the automatic document feeder, but not by the document glass.
The size set in [Original Size Settings] in the system settings
will be set.
- If the original size is not detected or
set, the selected paper size will be used as the original size for
copying.
To
set the standard value for the original size:
From the operation panel, select [System Settings] →
[Copy Settings] → [Original Size Settings].
SPECIFY THE ORIENTATION AND SIZE OF THE ORIGINAL
Tap the [Original] key to set the orientation of the
original.
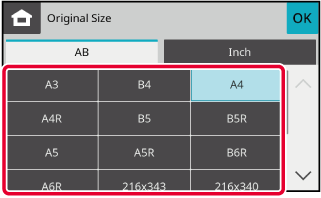
COPY MODETap the appropriate original size key.
After the settings are completed, tap [OK] key.
SPECIFYING THE ORIENTATION AND SIZE
OF A NON-STANDARD SIZE ORIGINALS
Tap the [Original] key to set the orientation of the
original.
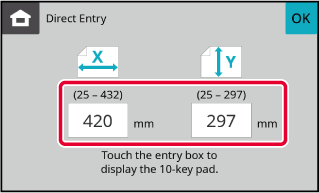
COPY MODETap the [Direct Entry] key.
Specify the original size.
After the settings are completed, tap [OK] key.
Tap the areas displaying width and height sizes
respectively, and enter the sizes using the numeric keys.
Tap the [OK] key.
Make sure that the original size you have set is displayed
in the upper left corner of the screen.