SHARP

Language

FUNCTIONS TO ADJUST THE SIZE AND ORIENTATION OF THE IMAGE

ADJUST PRINT POSITION ON ODD AND EVEN PAGES SEPARATELY (PRINT POSITION)

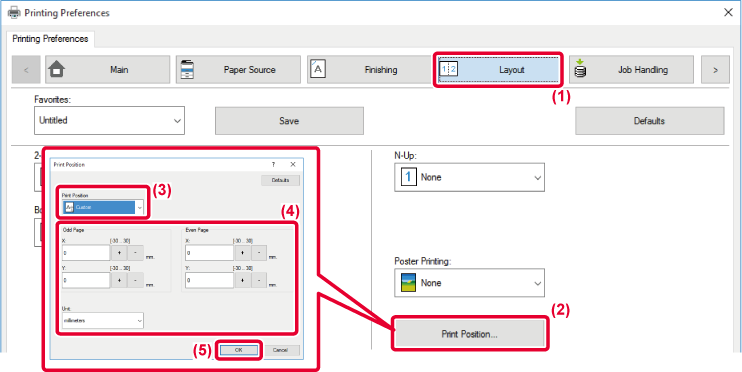
This function sets different print positions (margins) separately for odd and even pages and prints the pages.

This function is available in a Windows environment.

Windows

  1. Click the [Layout] tab.
  2. Click the [Print Position] button.
  3. Select [Custom].
  4. Set the amount of shifting of the print position for odd-numbered pages and even-numbered pages.
  5. Click the [OK] button.

ROTATING THE PRINT IMAGE 180 DEGREES (ROTATE 180 DEGREES)

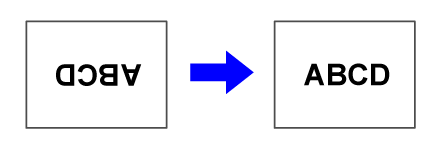
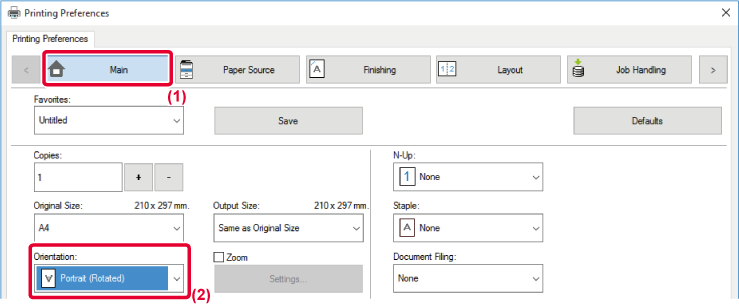
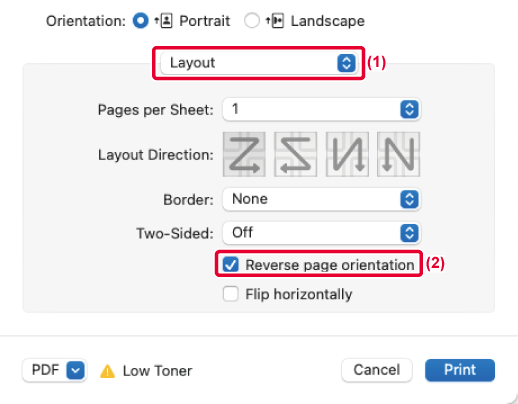
This feature rotates the image 180 degrees so that it can be printed correctly on paper that can be loaded in only one orientation (such as envelopes or paper with punch holes).

Windows

  1. Click the [Main] tab.
  2. Select [Portrait (Rotated)] or [Landscape (Rotated)] in "Orientation".

macOS

  1. Select [Layout].
  2. Select the [Reverse page orientation] checkbox so that appears.

ENLARGING/REDUCING THE PRINT IMAGE (ZOOM SETTING/ENLARGE OR REDUCE)

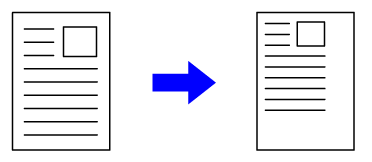
This function enlarges or reduces the image to a selected percentage.
This allows you to enlarge a small image or add margins to the paper by slightly reducing an image.

When using the PS printer driver (Windows), you can set the width and length percentages separately to change the proportions of the image. (On the BP-50C26/BP-50C31/BP-50C36/BP-50C45/BP-50C55/BP-50C65, the PS3 expansion kit is required.)

Windows

  1. Click the [Main] tab.
  2. Click the [Zoom] checkbox so that appears, and click the [Settings] button.
  3. Enter the percentage.
  4. By clicking the 
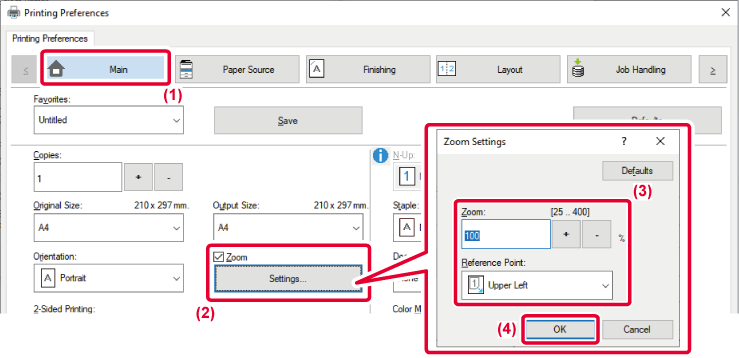
button, you can specify the value in increments of 1%. In addition, select [Upper Left] or [Center] for the base point on the paper.
  5. Click the [OK] button.

macOS

  1. Select [Page Setup] from the [File] menu and enter the ratio (%).
  2. Click the [OK] button.

ADJUST THE LINE THICKNESS (WIDTH)

Adjusting line widths used in data such as CAD

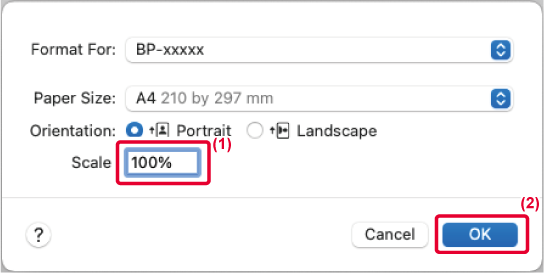
This function increases the thickness of the entire line when the print lines are not clear in CAD or other special applications.
When the data includes lines of varying widths, you can print all lines at the minimum width as necessary.

  • This function is available in a Windows environment.
  • This function can be used when the PCL6 printer driver is used.
  • When printing from an application that processes lines as raster graphics, line widths cannot be adjusted.

Windows

  1. Click the [Image Quality] tab.
  2. Click the [Line Width] button.
  3. Set the line thickness and click the [OK] button.
  • The units of line-width adjustment can be set to "Fixed Width" or "Ratio".
  • Select from the "Unit" menu.
  • To print all line data in the minimum line width, click the [Minimum Line Width] checkbox.

Thickening fine lines in Excel

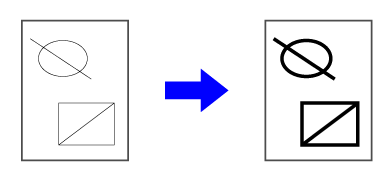
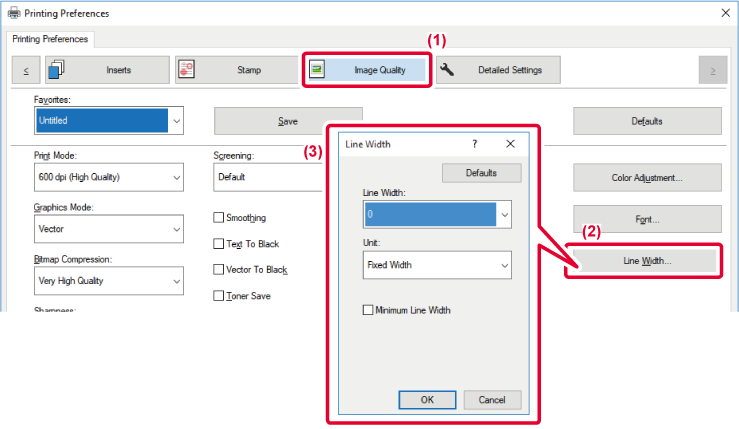
When fine border lines in Excel do not print correctly, you can make the lines thicker.
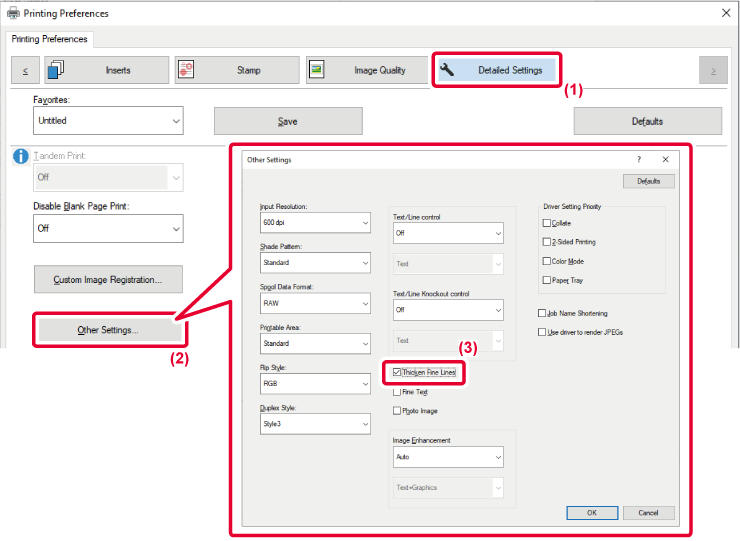
  • This function is available in a Windows environment.
  • This function can be used when the PCL6 printer driver is used.
  • Normally this setting is not necessary.

Windows

  1. Click the [Detailed Settings] tab.
  2. Click the [Other Settings] button.
  3. Select the [Thicken Fine Lines] checkbox ( ).

Adjusting the thickness of text and lines

You can make text and lines thicker. You can also make edges smoother or sharper.
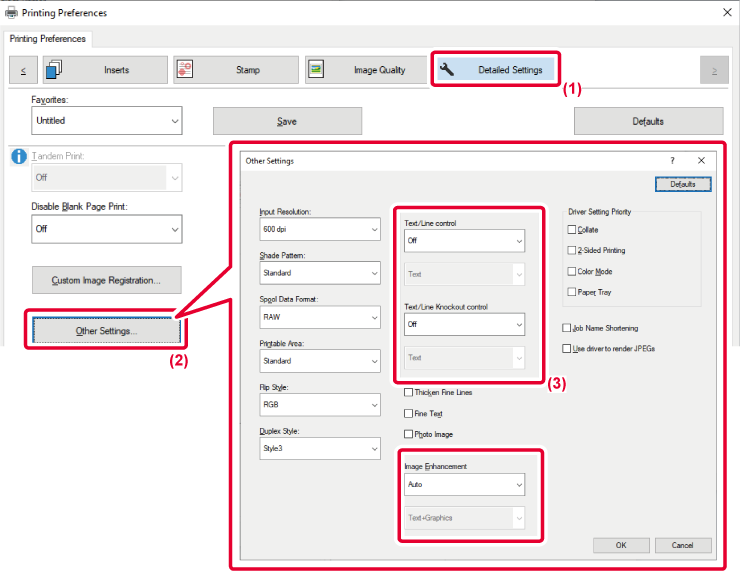
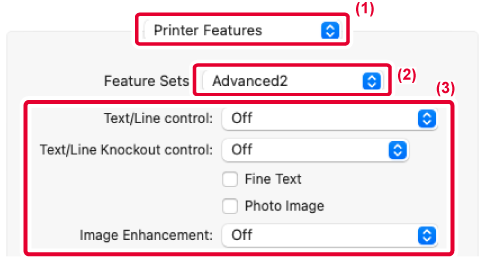
Windows

  1. Click the [Detailed Settings] tab.
  2. Click the [Other Settings] button.
  3. Specify the settings.
Item Description

Text/Line control

Text

You can make characters and text thicker.

Graphics

Text+Graphics

Text+Graphics+Photo

Text/Line Knockout control

Auto

You can make knockout text and lines thicker.

Off

Image Enhancement

Sharp

Text

You can make the edges of text and graphics smoother or sharper.

Auto: Perform optimal image enhancement.

Off: No image enhancement is applied.

Sharp: Image enhancement is applied sharply.

Soft: Image enhancement is applied smoothly.

Text+Graphics

Text+knockout text

Text+Graphics+knockout text

Text+Graphics+knockout

Soft

Text

Text+Graphics

Text+knockout text

Text+Graphics+knockout text

Text+Graphics+knockout

macOS

  1. Select [Printer Features].
  2. Select [Advanced2].
  3. Specify the settings.

PRINT A MIRROR-IMAGE (MIRROR-IMAGE REVERSE/VISUAL EFFECTS)

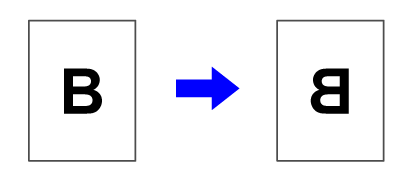
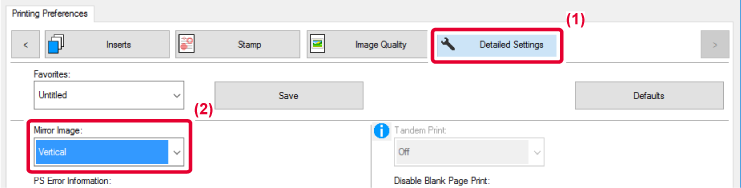
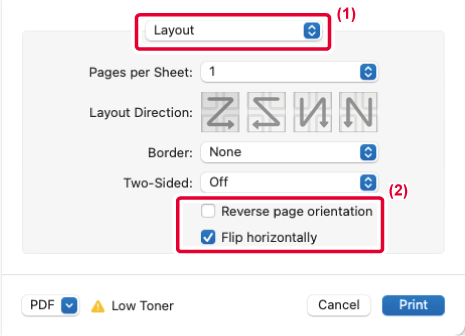
The image is reversed to create a mirror image.
This function is conveniently used to print a design for a woodblock print or other printing medium.

In a Windows environment, this function is only available when using the PS printer driver.
(On the BP-50C26/BP-50C31/BP-50C36/BP-50C45/BP-50C55/BP-50C65, the PS3 expansion kit is required.)

Windows

  1. Click the [Detailed Settings] tab.
  2. If you wish to reverse the image horizontally, select [Horizontal]. If you wish to reverse the image vertically, select [Vertical].
macOS
  1. Select [Layout].
  2. Select the [Flip horizontally] checkbox ( ).
Language

Version 03a / bp70c65_usr_03a_us

↑Top of page