This function adjusts the
brightness and contrast in the print settings when a photo or other
image is printed.
This function makes simple corrections even if image editing
software is not installed on your computer.
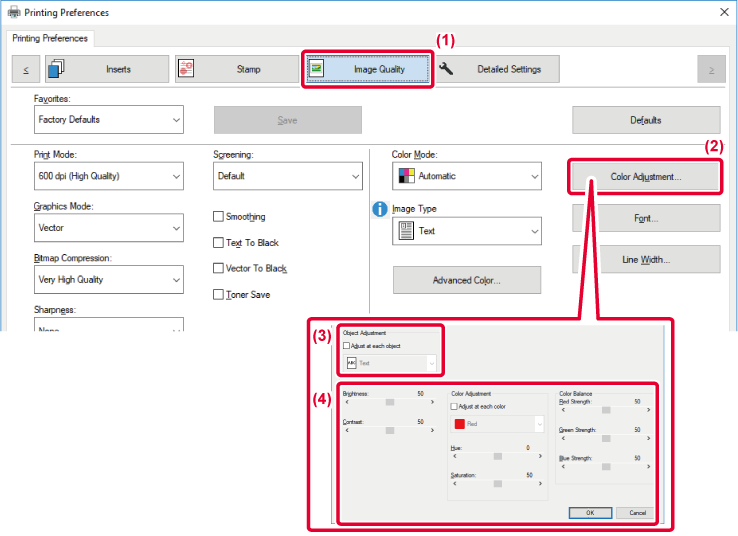
 ) and select the object.
 or click
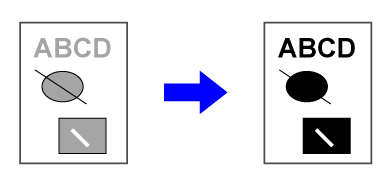
When printing a color image
in grayscale, text and lines that are drawn in faint colors are
printed in black. This function allows you to bring out color text
and lines that are faint and difficult to see when printed in grayscale.
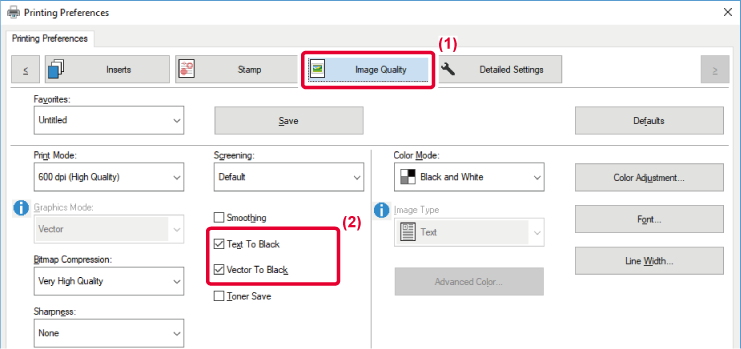 appears.
Preset color settings are
available in the machine's printer driver for various uses. These
enable printing using the most suitable color settings for the color
image type.
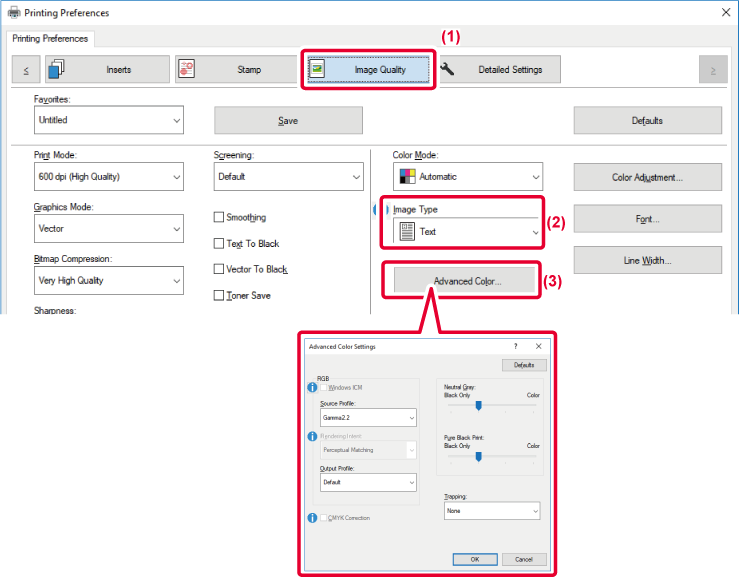
Advanced color settings, such as the color management settings
and the screening setting for adjusting the color tone expression,
are also available for meeting the needs of color image printing.
The following color management settings are available.
|
Windows ICM |
Color management method in a Windows environment |
|---|---|
|
ColorSync |
Color management method in a macOS environment |
|
Source Profile |
Select a source color profile of color matching. |
|
Rendering Intent |
The selections below provide the ability to modify color image processing to suit specific preferences. (Color matching method: Method of color converting RGB colors on the display, etc. into CMYK colors in the printer) |
|
Output Profile |
Select a color profile for the image to be printed |
|
CMYK Correction *1 |
Correct the image to obtain the optimum printing result when printing a CMYK image. |
|
Screening |
Select the screening to modify the image to suit specific preferences, according to the appropriate image processing method. |
|
Neutral Gray |
Select a creating method of neutral gray. |
|
Pure Black Print |
Select whether you want to print black data area with only black toner. |
|
Trapping |
Select to prevent void area which may be generated around edge of colors. |
|
Sharpness |
This is used to sharpen an image or make it softer. |
|
Black Overprint *2 |
Prevents whitening of the outline of black text. |
|
CMYK Simulation *2 |
Adjusts the colors to simulate printing that would be obtained with the process colors used in printing presses. |
|
Preserve Pure CMYK Colors |
When using CMYK simulation, retain cyan, magenta, and yellow pure colors, and retain black printer information. |
|
Simulation Profile *2 |
Select the simulation target. |
Can only be used when using the PCL6 printer driver.
Can only be used when using the PS printer driver (Windows/macOS). (On the BP-50C26/BP-50C31/BP-50C36/BP-50C45/BP-50C55/BP-50C65, the PS3 expansion kit is required.)
 appears.
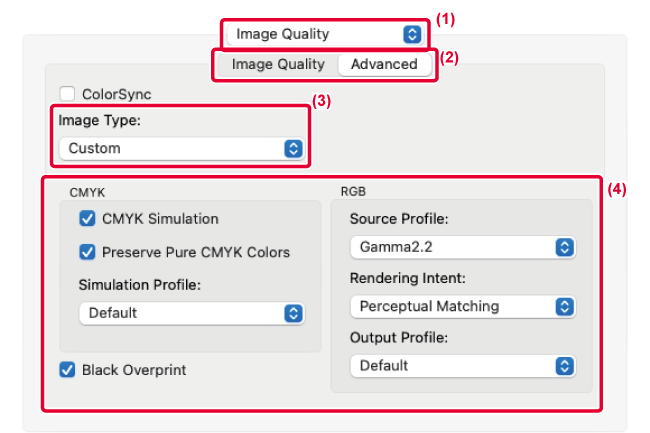
 appears. In this case, you cannot select
"Image Type".), and then select the desired setting.
appears. In this case, you cannot select
"Image Type".), and then select the desired setting.Version 06a / bp70c65_usr_06a_us
