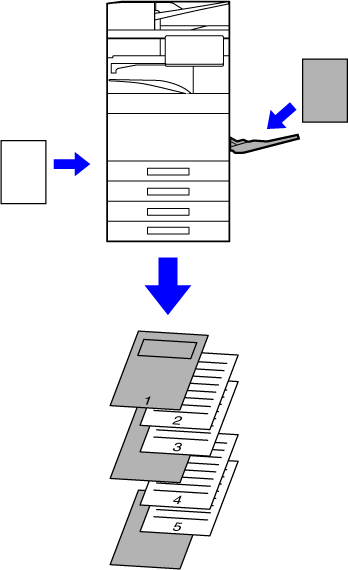
The front and back covers and specified pages of a document
are printed on paper that is different from the other pages.
Use this function when you wish to print the front and back
covers on heavy paper, or insert colored paper or a different paper
type at specified pages.
As necessary, paper can be inserted as insertion sheets where
nothing is printed.
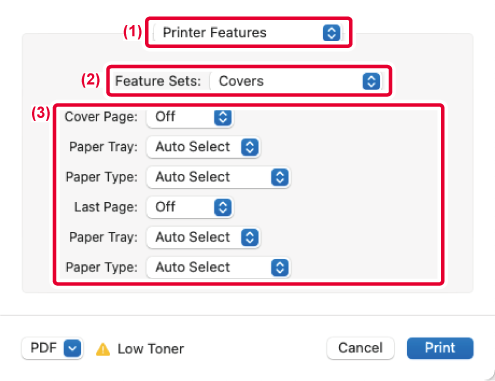
The front and back covers are printed using paper that
is different from the other pages. This function can be used, for example,
when you want to print only the front cover and last page on thick
paper.
When transparency film is
used for printing, this function prevents the sheets of transparency
film from sticking together by inserting a sheet of paper between
each sheet of film. As necessary, the same content as that printed
on each sheet of transparency film is also printed on the corresponding
sheet of inserted paper.
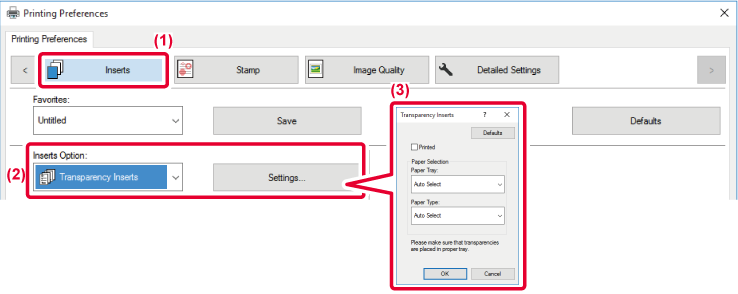
 , the same content as that printed on
the transparency film is also printed on the insert. Select the
paper source and type if needed.
, the same content as that printed on
the transparency film is also printed on the insert. Select the
paper source and type if needed.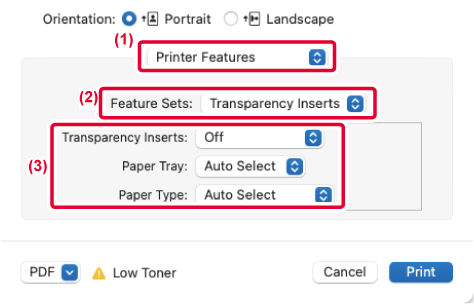
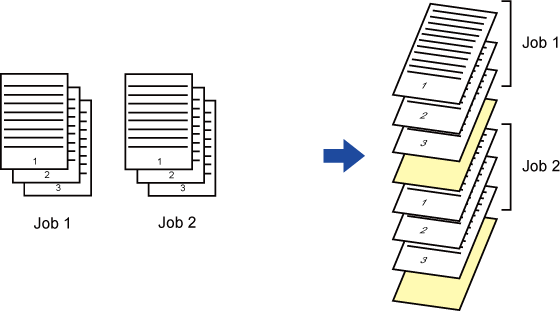
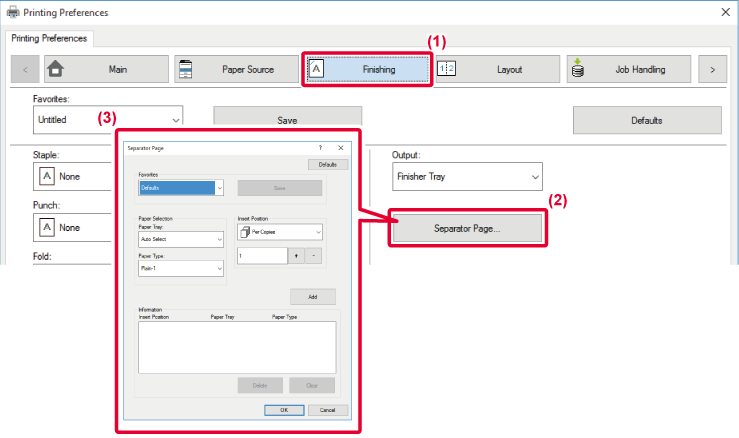
You can insert separator
pages between jobs or the specified number of copies.
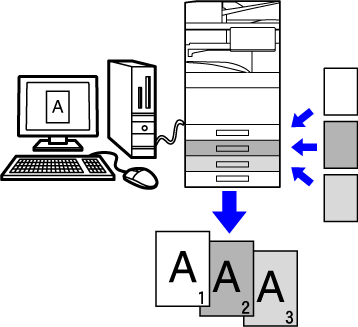
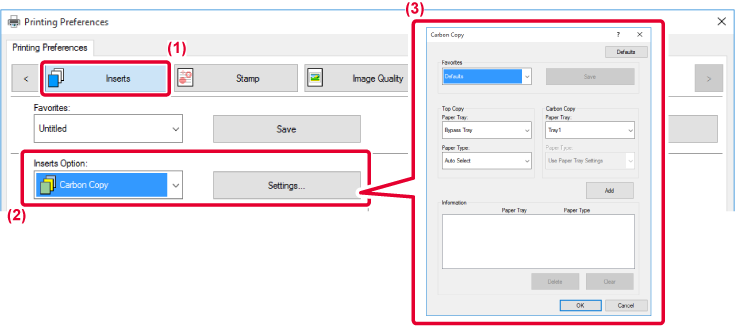
This function prints an
additional copy of the print image on paper that is of the same
size but from a different paper tray.
For example, if carbon copy print is selected when plain paper
is loaded into tray 1 and colored paper is loaded into tray 2, a
print result similar to a carbon copy slip is obtained with a single
selection of the print command. If plain paper is loaded into tray
1 and recycled paper is loaded into tray 2 as necessary, selecting
Carbon Copy simultaneously prints one copy for presentation and
one copy as a duplicate.
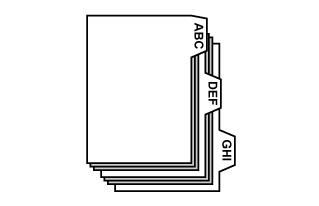
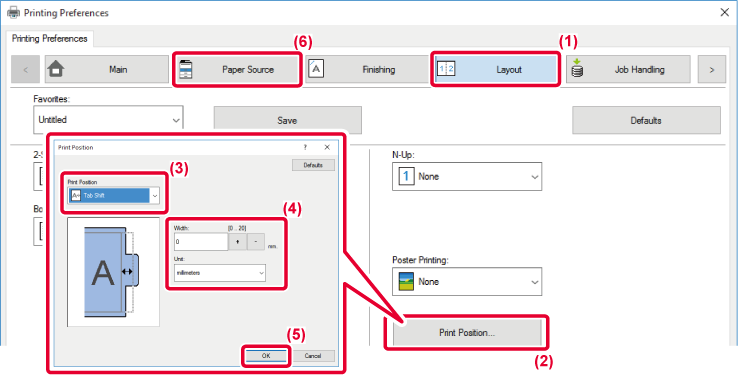
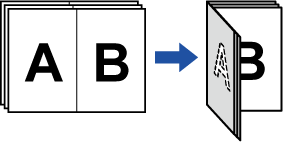
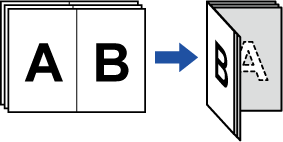
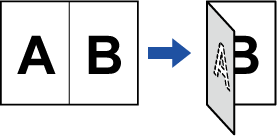
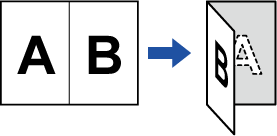
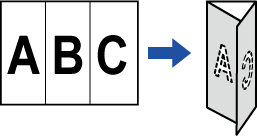
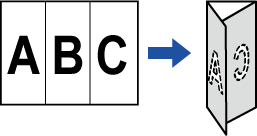
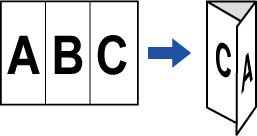
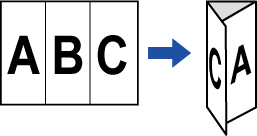
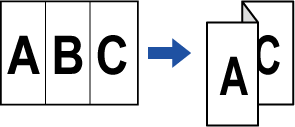
There are two methods of
printing on the tabs of tab paper: "Tab Shift" and "Tab Paper Print".
Create the text to be printed on tab paper in an application,
and set the test shifting distance in [Print Position] on the [Layout]
tab of the printer driver property window. The text will be printed
on the tabs.
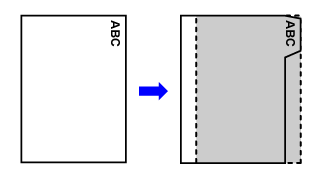
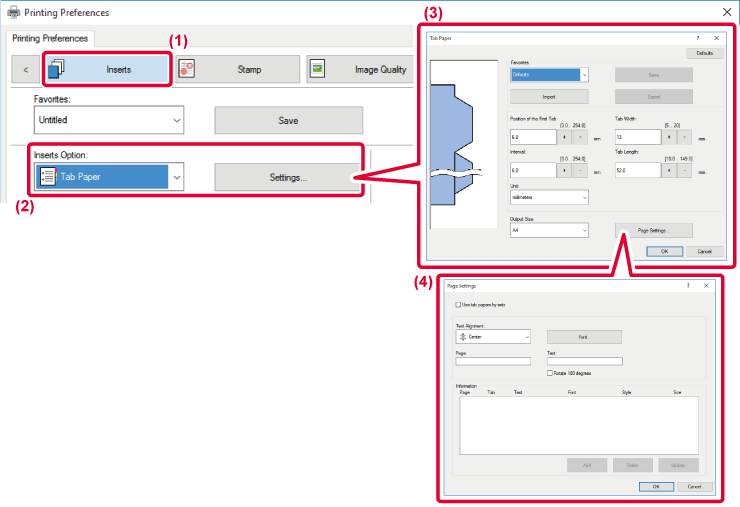
Tab sheets are printed while they are inserted between
the desired pages.
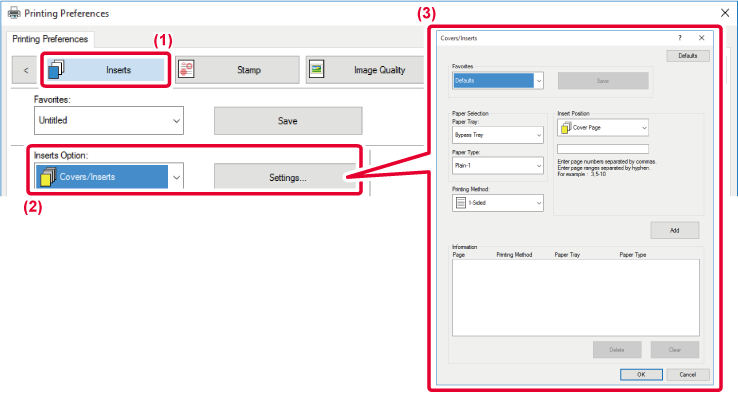
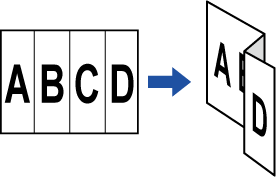
Select [Tab Paper] in [Inserts Option] on the [Inserts] tab
of the printer driver properties window, and enter the text that you
want to print on the tabs. Specify the detailed settings such as
the size of the tabs, the starting position, the distance between
tabs, and the page numbers where tab sheets will be inserted.
When you have finished preparing the data to be printed
on tab papers in an application, take the following steps:

 button.
Open the data into which you wish to insert tab paper,
and then select the settings.
 button. In addition, select the size
of the tab paper from "Output Size".
button. In addition, select the size
of the tab paper from "Output Size".This function prints specific
pages on the front side of the paper.
When you specify a page (such as a chapter cover page) to
be printed on the front side of the paper, it is printed on the front
side of the next sheet even if it would normally be printed on the
reverse side of the paper.
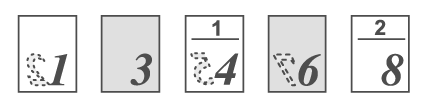
Example: When pages 4 and 8 are specified as page settings.
(4 has a reverse side, and 3 and 8 are blank on the reverse
side.)
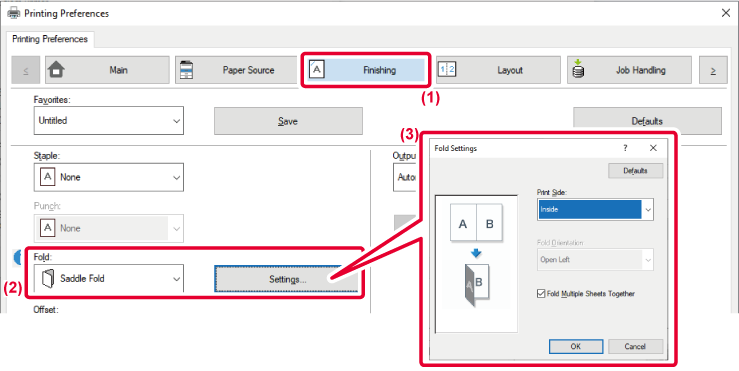
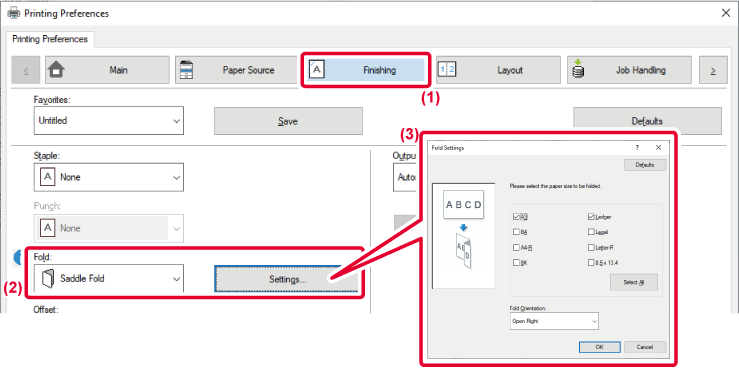
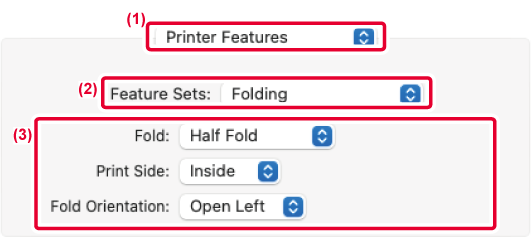
If a folding unit is installed,
print paper can be folded.
For example, if A4 (8-1/2" × 11") and A3 (11" × 17") size
print images are mixed, you can fold A3 (11" × 17") size paper to
the A4 (8-1/2" × 11") size to adjust the width of the actual print
paper to the A4 (8-1/2" × 11") size. When necessary, you can staple
folded sheets.
| Folding types | Print Side | Fold Orientation | Folding results | Descrition |
|---|---|---|---|---|
|
Saddle Fold |
Inside |
- |
 |
Multiple sheets are collectively
folded in the center. |
|
Outside |
- |
 |
||
|
Half Fold |
Inside |
- |
 |
Paper is folded in the center. Copies are output sheet by sheet. |
|
Outside |
- |
 |
||
|
C-Fold |
Inside |
Open Right |
 |
For example, paper is folded in three so that it can be put into an envelope. Copies are output sheet by sheet. |
|
Open Left |
 |
|||
|
Outside |
Open Right |
 |
||
|
Open Left |
 |
|||
|
Accordion Fold |
- |
Open Right |
 |
For example, paper is folded in three so that it can be put into an envelope. Copies are output sheet by sheet. |
|
- |
Open Left |
 |
||
|
Z-Fold |
- |
Open Right |
 |
For example, if A4 (8-1/2" × 11") and A3 (11" × 17") size print images are mixed, only the A3 (11" × 17") size paper is folded and changed to A4 (8-1/2" × 11") size paper. Copies are output sheet by sheet. |
|
- |
Open Left |
 |
 .
.

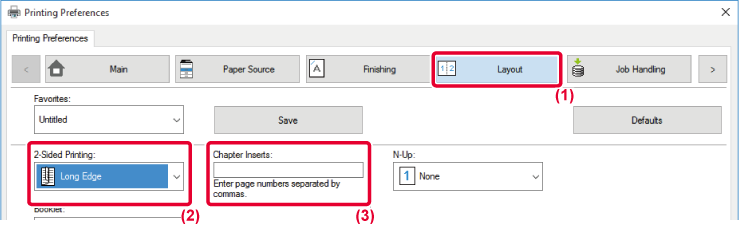
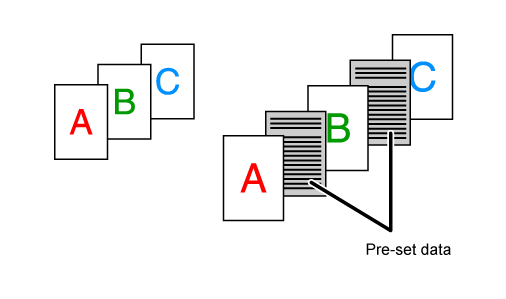
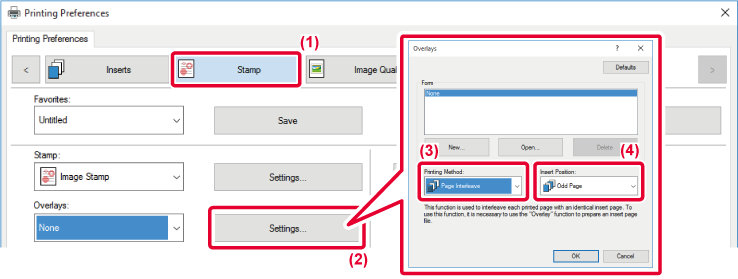
This function inserts a
preset data item into every page during printing.
You can easily create documents with opened page spread that
is made up of text on the left-hand page and a memo space on the
right-hand page.
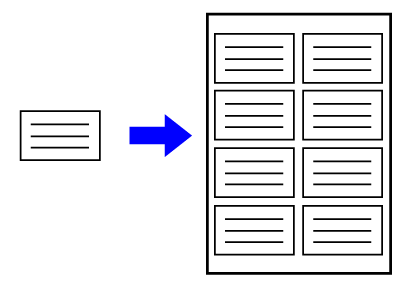
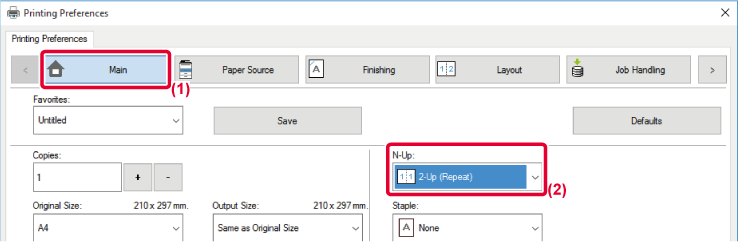
This function prints the
same image in tile pattern on a sheet. This is useful for producing
name cards and stickers.
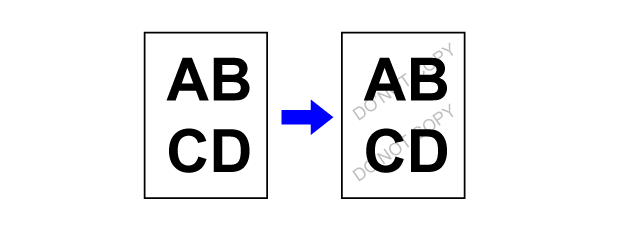
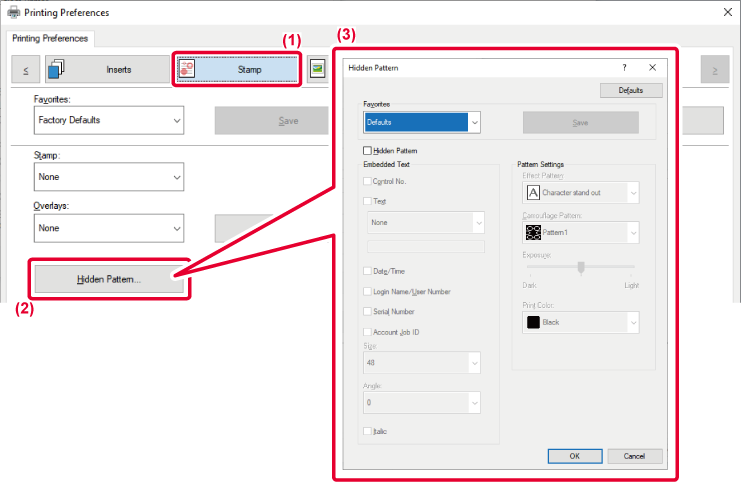
This function prints pattern
data such as "DO NOT COPY" behind the print data.
If paper with pattern data is duplicated, the pattern data
emerges in the background, which will help to prevent information
from being leaked through unauthorized document copying.
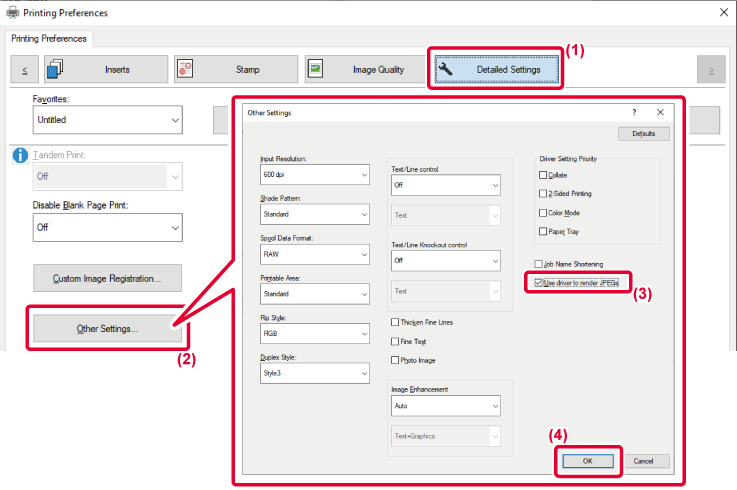
In some situations, a document
containing a JPEG image may not be printed correctly. This can be
solved by changing the way the JPEG image is rendered.
When you print an original containing JPEG images, this function
allows you to select whether the images are rendered in the printer
driver or the machine.
 appears.
By maximizing the print
area, you can print on the full paper size.

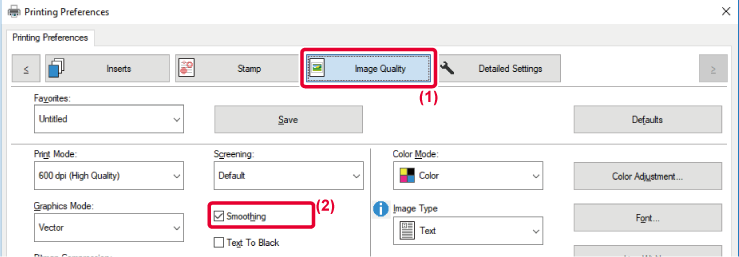
Resolution enhancement techniques
(RETs) are used to smoothen the outlines of images. The images are
printed at a digitally enhanced resolution.
 appears.
Version 06a / bp70c65_usr_06a_us
