SHARP

Language

TRAY 1 - 4

A maximum of 500 sheets of paper from size 5-1/2" x 8-1/2" to 8-1/2" x 11" (A6 to A4) can be loaded into tray 1. (150 sheets when the paper is A6)
A maximum of 600 sheets of paper from size 5-1/2" x 8-1/2" to 8-1/2" x 14" (A5 to A4) can be loaded into trays 2 to 4.

If you loaded paper of a different type or size from the paper previously loaded, be sure to check the settings in "Settings (administrator)". Incorrect setting affects automatic paper selection action. It may cause print failure, printing on paper of a wrong size or type or paper misfeeds.

Caution

Do not place heavy objects on the tray or press down on the tray.

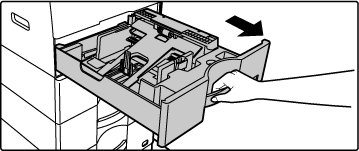
Pull out the paper tray.

Gently pull the tray out until it stops.
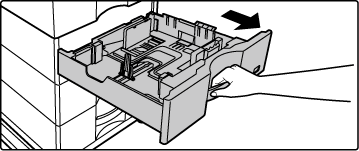
To load paper, go to step 3. To load a different size of paper, go to the next step.
Tray 1
Tray 2 - 4
When using the tray 1, push the center of the pressure plate down until it locks into place.

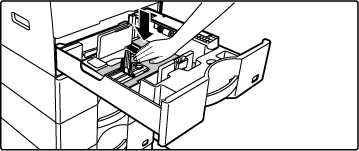
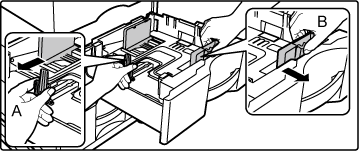
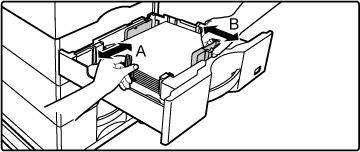
Move guide plates A and B in the tray to the maximum position.

The guide plates A and B are slidable. Squeeze the separator plate lever.
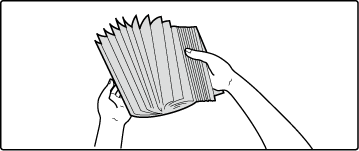
Fan the paper.

Fan the paper well before loading it. If the paper is not fanned, multiple sheets may feed at once and cause a misfeed.
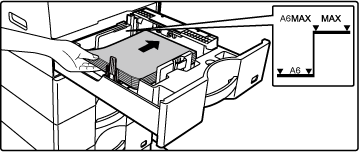
Insert the paper into the tray.

Load the paper with the print side facing up. The stack must not be higher than the indicator line (Tray 1: maximum of 500 sheets (Maximum of 150 sheets of A6 paper), trays 2 to 4: maximum of 600 sheets).
Do not load the paper as shown below.
  • If a paper misfeed occurs, turn the paper over and/or around, and reload.
  • If the paper is curled, fix the curl before loading the paper.
  • Adjust the divider plate so that there is no gap between the paper and divider plate.
  • Do not add paper.

Adjust guide plates A and B with the paper.

Adjust to the paper size so that the paper will not be too loose or too tight.
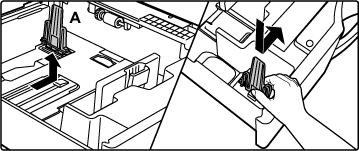
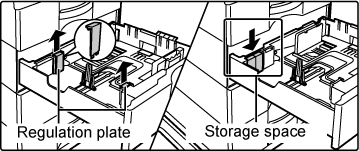
  • When loading A4 size paper in tray 1, or 8-1/2" x 14" paper in trays 2 to 4, remove divider plate A. Move divider plate A all the way to the paper feed opening (right side), and pull up. Store the removed divider plate A in the position shown in the illustration.
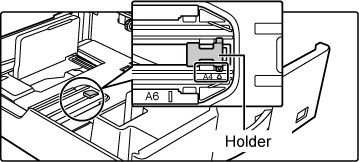
  • Check if the holder in the cassette is positioned at A4 (8-1/2" x 14” in trays 2 to 4).
  • When setting 8-1/2" x 11" size paper in tray 2 to 4, remove the 2 regulation plates with green color on the front and back side of the tray before setting the paper. The plates are contained in the inside storage space of the back side of the tray.

Gently push the paper tray into the machine.

Push the tray firmly all the way into the machine slowly.
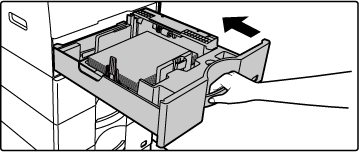
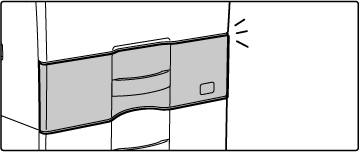
Forcefully inserting the tray may cause the paper to be skewed and misfeed.
Close the tray completely.

LOADING ENVELOPE IN TRAY 1

Load the paper with the copy and print side facing up. The diagram shows an example of printing on the front side.
The maximum number of sheets (50) may not exceed the indicator line.
Envelopes with triangular flaps cannot be used in tray 1.

Caution

When loading envelopes, the fusing pressure release lever must be operated. Be sure to operate the fusing pressure release lever by refer to "Fusing pressure release lever".
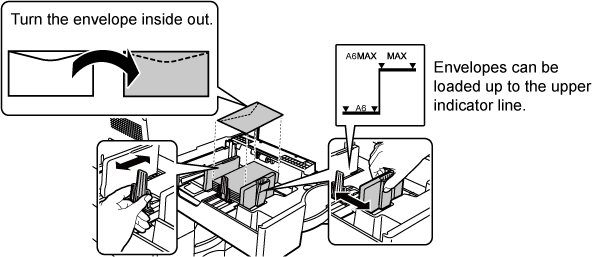
Cautions when placing envelopes

  • Removing curling
  • Ensure these are flat, containing no air
  • Ensure the four folded edges are pressed flat (for items with flaps, three edges)
  • Align on a flat surface
    • Before printing envelopes in tray 1, print a trial print to check the results.
    • If the envelope is not folded tightly, is warped or bent, it may cause misfeeds.
    Language

    Version 02a / bpc545wd_usr_02a _us

    ↑Top of page