This section explains how to enter a destination from
the initial screen of easy mode.
EASY MODE
Tap the [Direct Entry] key or [Fax Number] to enter the destination fax number.
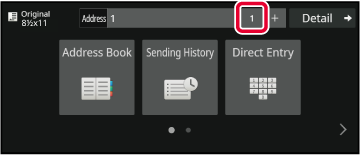
If you want to specify multiple destinations, tap and enter the next fax number.
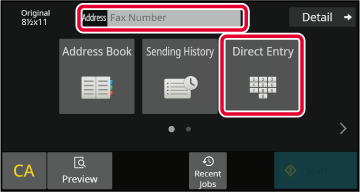
Enter a pause after the number used to dial out from
a PBX (for example, after "0"), or after the country code when dialing an
international number.
Tap the [Pause] key.
A hyphen "-" is entered when the [Pause] key is tapped once.
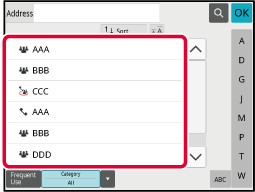
A destination fax number is retrieved by simply tapping the one-touch
key of that destination on the address book screen. (One-touch dialing)
It is also possible to store multiple fax numbers in a one-touch
key, allowing you to retrieve all the numbers by simply tapping
the key. This dialing method is convenient when you wish to send
a fax to (or poll) multiple fax destinations.
When destinations of other scan modes are stored in addition
to fax destinations, an icon indicating the mode appears together
with the name of the destination in each one-touch key.
|
|
Fax |
|---|---|
|
|
Scan to E-mail |
|
|
Internet Fax (Direct SMTP) |
|
|
Scan to FTP |
|
|
Scan to Network Folder |
|
|
Scan to Desktop |
|
|
Group key with multiple destinations |
Tap the [Address Book] key.
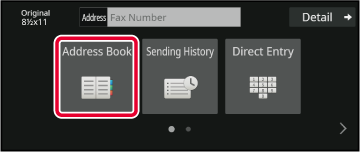
Tap a one-touch key of contact or group that includes the fax destination.
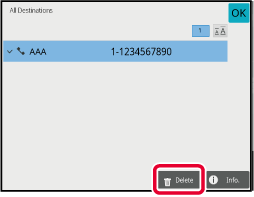
When multiple destinations have been selected,
you can display and check the destinations. You can also delete
a destination (cancel selection of the destination) if necessary.
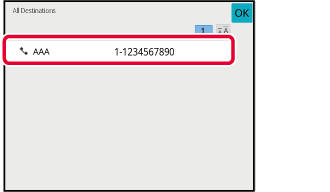
Tap the [All Destinations] key.
Confirm the destination.
After the confirmation is completed, tap .
.
Select the address and tap the [Delete] key.
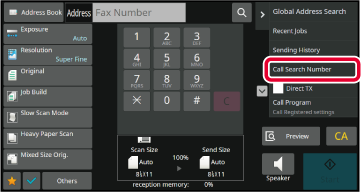
The search number can be used to specify
a destination stored in an address book.
Tap the [Detail] key to change normal mode.
EASY MODETap [Call Search Number] on the action panel.
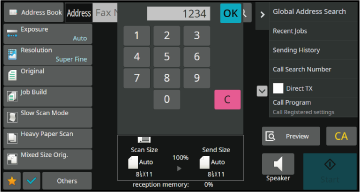
Enter a search number (4 digits) using the numeric keys
and tap
 .
.
 .
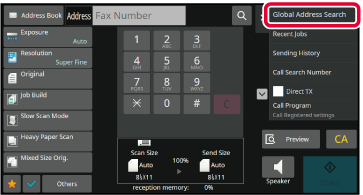
.If an LDAP server is configured in the setting
mode (Web version), you can search for the desired destination in
the global address book and obtain the fax number when performing
a fax transmission.
You can also add a retrieved address to the address book.
However, addresses of the FTP/Desktop transmission cannot be stored
from the machine.
In the base screen or address book screen, tap [Global Address Search] on the action panel.
Tap [Target] and tap the LDAP server to be used.
.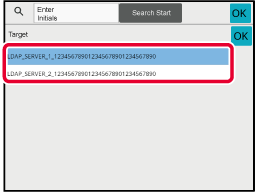
Tap
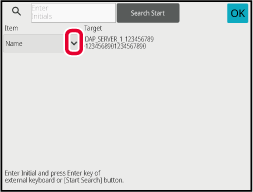
 of [Item], and select an item to be
searched from [Name/Address].
of [Item], and select an item to be
searched from [Name/Address].
 can be used as follows:XXX : Names containing the search characters will be searchedXXX : Names that end with "XXX"XXX
: Names containing "XXX"XX : Names that start with "AA" and end
with "XX".
can be used as follows:XXX : Names containing the search characters will be searchedXXX : Names that end with "XXX"XXX
: Names containing "XXX"XX : Names that start with "AA" and end
with "XX".Enter a keyword and tap the [Search Start] key.
When you tap the keyword entry box, the soft keyboard appears. to close the address information screen.
If the machine and mobile device are connected
by Bluetooth, you can retrieve a destination from the mobile address book.
Destinations for fax transmission and e-mail transmission
can be retrieved.
Tap the [Mobile Address Book] key.
In Easy mode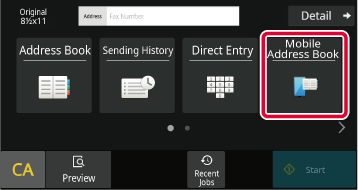
In the base screen or address book screen, tap [Refer to Mobile Address Book] on the action panel.
In Normal mode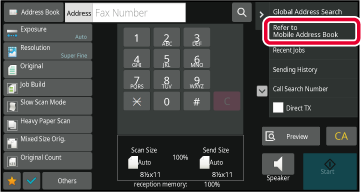
Operate the mobile device to be connected to pair it with the machine.
Device name of the machine is displayed on the screen.
Tap (
) of [Name], and select an item to be
searched from [Initial], [Name] or [Address].
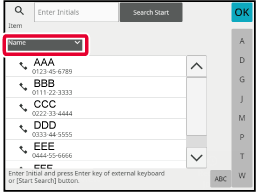
Enter a keyword and tap the [Search Start] key.
When you tap the keyword entry box, the soft keyboard appears.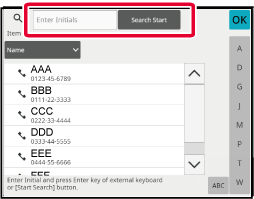
Select a destination from a transmission
log and resend the data.
The destinations of the most recent 50 transmissions by fax,
Scan to E-mail, and/or Internet fax are stored. One of these can
be selected to resend to that destination. The destinations of the
FTP/Desktop transmission and Scan to Network Folder are also shown
in the transmission log.
In normal mode, you can also add an address in a transmission
history to the address book. This is a convenient way to store the
fax numbers and addresses of destinations that were manually entered.
However, addresses of the Network Folder transmission cannot be
stored from the machine.
Tap the [Sending History] key.
In Easy mode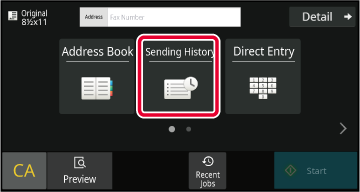
In the base screen or address book screen, tap [Sending History] on the action panel.
In Normal mode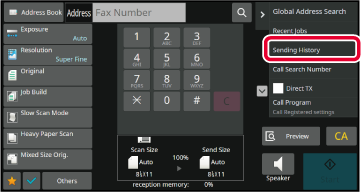
Tap the key of the fax destination that you wish to redial.
The last 50 addresses used for transmission are displayed.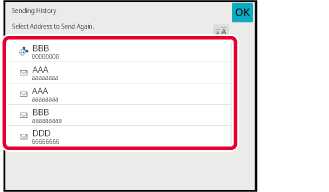
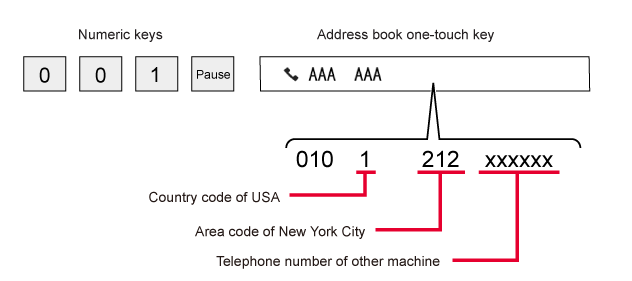
Number sequences entered
using the numeric keys and/or one-touch keys can be linked together
with pauses and dialed as a single number.
For example when dialing an international number, tap the [Pause]
key between the identification number of an international telephone
service company (e.g., "001") and the country code (e.g., "81" for
Japan) to insert a pause for smoother line connection.
The time (in seconds) set in "Settings", select [System Settings]
→ [Image Send Settings] → [Fax Settings] → [Default Settings] → [Pause Time Setting]
defines
the length of pause. Set a value from 1 to 15 seconds in increments
of 1 second.
On the screen, a hyphen "-" indicates a pause.
If two seconds are set in [Pause Time Setting], tapping the [Pause]
key three times enters pauses for 6 seconds.
Example:
Using chain dialing to dial an international number
Version 06a / bp70c65_usr_06a_us
