This section explains how
to automatically select the appropriate ratio to meet the paper
size when manually changing the paper tray to make a copy on paper
that has a size different from the original.
Manually select the paper tray, and place the original.
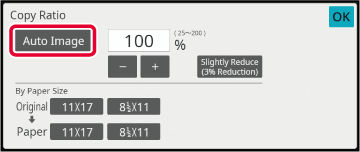
Place the original in the document feeder tray of the automatic document feeder, or on the document glass.Tap the [Copy Ratio] key.
COPY MODETap the [Auto Image] key.
The reduction or enlargement ratio is automatically selected based on the original size and the selected paper size.This section explains how to specify any
ratio when making a copy on paper that has a size different from
the original or changing the image size for copying.
The following three methods can be used to specify the ratio.
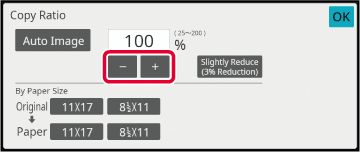
You can adjust the zoom ratio in 1% increments using
 or the 10 key to specify the desired
zoom ratio.
or the 10 key to specify the desired
zoom ratio.
You can also select the enlargement or reduction ratio between
commonly used fixed sizes from the preset ratio keys.
Up to two ratio values can be added to preset ratio keys,
respectively for enlargement and reduction.
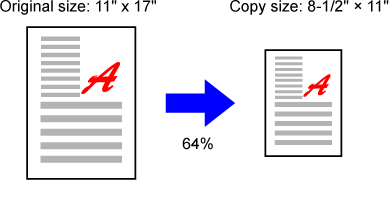
Specify the paper sizes of the original and output to
automatically obtain the appropriate ratio.
For example, when you select A3 as the original size and A4
as the paper size, the ratio is automatically set to 70%.
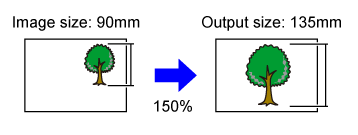
Specify the image sizes of the original and output to
automatically obtain the appropriate ratio.
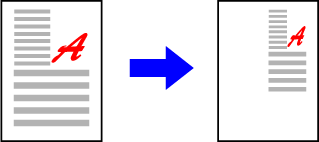
To make a copy with the same ratio between the vertical and
horizontal sizes, enter either one of the vertical and horizontal
sizes.
For example, when you enter 90mm as the source size and 135mm
as the output size, the aspect ratio will be automatically set to
150%.
Tap the [Copy Ratio] key.
COPY MODETap
 to set the ratio.
 .
.Tap the [Copy Ratio] key.
COPY MODESpecify the original size (paper size of the loaded original) and the copy size (paper size of the copy output).
After the settings are completed, tap [OK] key.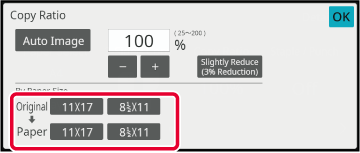
Tap the [Detail] key to change to normal mode.
EASY MODETap the [Copy Ratio] key.
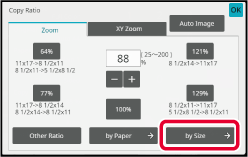
Tap the [by Size] key of the [Zoom] tab.
Specify the image size (dimensions of the image to be enlarged or reduced) and the output size (dimensions of the enlarged and reduced images).
Tap the area of image size and output size, and enter the sizes using the numeric keys.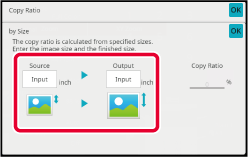
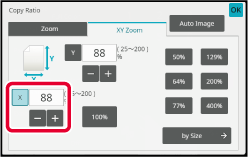
This section explains how to individually
specify the horizontal and vertical copy ratios.
When
50% is selected for the horizontal ratio and 70% is selected for
the vertical ratio
 , which allows you to adjust the ratio
in 1% increments.
, which allows you to adjust the ratio
in 1% increments.Tap the [Detail] key to change to normal mode.
EASY MODETap the [Copy Ratio] key, and then tap the [XY Zoom] tab.
Tap the [X] key, and set the X (horizontal) ratio.
 .
.Tap the [Y] key, and set the Y (vertical) ratio in the same way as the [X] key.
After the settings are completed, tap [OK] key.Tap the [by Size] key.
Specifying the desired zoom ratioSpecify the X and Y dimensions of the image size and those of the output size.
Check that a paper size suitable for the ratio is selected.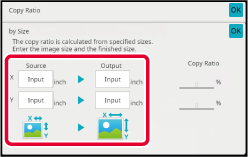
Version 06a / bp70c65_usr_06a_us
