An image can be sent in
scan mode (Scan to E-mail, Scan to FTP, Scan to Desktop, and Scan
to Network Folder).
Warning
Do not place any objects under the original size detector. Closing the automatic document feeder with an object underneath may damage the original size detector plate and prevent correct detection of the document size.Place the original.
Place the original in the document feeder tray of the automatic document feeder, or on the document glass.-2.png)
 ). If placed in landscape (horizontal) orientation
(
). If placed in landscape (horizontal) orientation
( ), an incorrect size will be detected.
For an 5-1/2" x 8-1/2"R (A5R) size original, enter the original
size manually.
), an incorrect size will be detected.
For an 5-1/2" x 8-1/2"R (A5R) size original, enter the original
size manually.Specify the destination.
RETRIEVING A DESTINATION FROM AN ADDRESS BOOK Scan to E-mail
 Scan to FTP
 Scan to Network Folder
 Scan to Desktop
 , the destination of the tapped key is automatically
specified.
, the destination of the tapped key is automatically
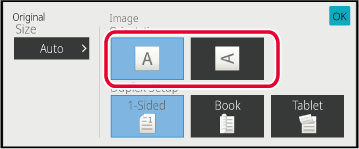
specified.Tap the [Original] key.
Tap the appropriate orientation key.
Specify the orientation of the original placed in step 1. .
.
Tap the [B/W Start] or [Color Start] key to start scanning of the original.
If the original was placed on the document glass, replace it with the next original and tap the [B/W Start] or [Color Start] key.
Repeat until all originals have been scanned.Tap the [Read-End] key.
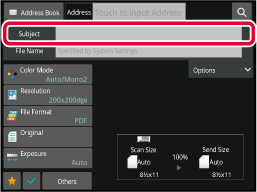
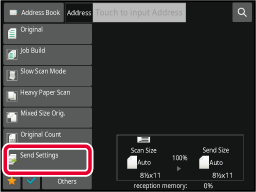
A beep will sound to indicate that the operation is completed.Change the subject, file name, reply-to,
and body text when performing a scan transmission. If necessary,
directly enter the text.
Tap the [Detail] key to change to normal mode.
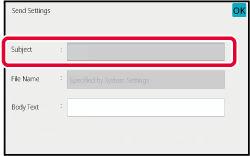
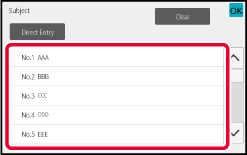
EASY MODETo change the subject, tap the [Subject] entry box.
Tap a pre-set text key.
After the settings are completed, tap.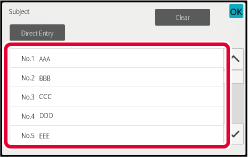
To change the file name, tap the [File Name] entry box.
After the settings are completed, tap.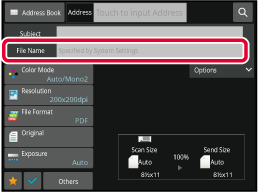
Tap [Options].
To change the reply address, tap the [Reply-To] entry box.

Tap the key that you wish to use for the reply address.
After the settings are completed, tap. adds a reply address to the Cc address.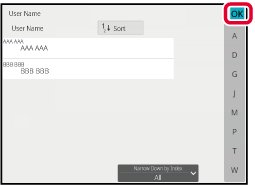
To change the body text, tap the [Body Text] entry box.
Enter the body text.
After the settings are completed, tap.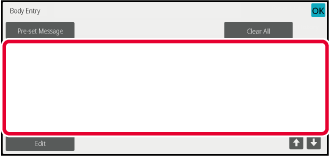
Transmits a fax in Internet
Fax mode. This procedure can also be used to perform a direct transmission
by Direct SMTP.
Place the original.
Place the original in the document feeder tray of the automatic document feeder, or on the document glass.Warning
Do not place any objects under the original size detector. Closing the automatic document feeder with an object underneath may damage the original size detector plate and prevent correct detection of the document size. ).
If placed in landscape orientation (
), an incorrect size will be detected.
For an 5-1/2" x 8-1/2"R (A5R) size original, enter the original
size manually.
).
If placed in landscape orientation (
), an incorrect size will be detected.
For an 5-1/2" x 8-1/2"R (A5R) size original, enter the original
size manually.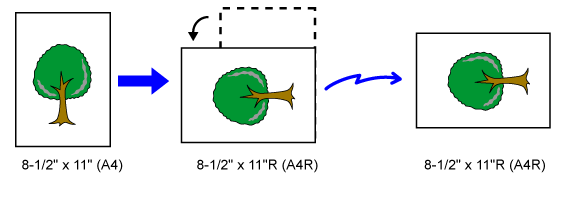
Tap the mode display to switch to the initial screen of Internet Fax mode.
SELECTING NETWORK SCANNER MODESpecify the destination.
RETRIEVING A DESTINATION FROM AN ADDRESS BOOK appears in one-touch keys in which Internet
fax addresses are stored.
appears in one-touch keys in which Internet
fax addresses are stored.Tap the [Original] key.
Tap the appropriate orientation key.
After the settings are completed, tap.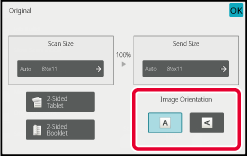
Tap the [Start] key to start scanning of the original.
If the original was placed on the document glass, replace it with the next original and tap the [Start] key.
Repeat until all originals have been scanned.Tap the [Read-End] key.
A beep will sound to indicate that the operation is completed.Change the subject, file name, and body
text when performing an Internet fax transmission. If necessary,
directly enter the text. Configure a file name, and other settings
for an Internet fax using the Send Settings of the other functions.
Tap the mode display to switch to the initial screen of Internet Fax mode.
SELECTING NETWORK SCANNER MODETap the [Send Settings] key.
To change the subject, tap the [Subject] entry box.
Tap a pre-set text key.
To change the file name, tap the [File Name] entry box.
Tap a pre-set text key.
After the settings are completed, tap.
To change the body text, tap the [Body Text] entry box.
Enter the body text.
After the settings are completed, tap.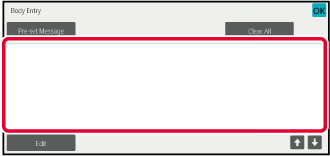
 to select on a line basis.
Send the same scanned image
to multiple scan, Internet fax, and fax mode destinations in a single
operation.
One operation allows you to send data to up to 500 destinations,
including the reserved send jobs. (For example, if broadcast transmission
jobs with 450 destinations are already reserved, data can be broadcasted
to up to 50 destinations.)
.png)
It is convenient to store destinations you frequently
use for broadcast transmission as contacts or groups.
A maximum of 500 destinations can be stored in one contact.
For broadcast transmission, the contact or group key can be
simply tapped to retrieve multiple fax numbers.
You can also send faxes with the one-touch key by setting
the [Set as Default used] checkbox to
when addresses are registered. If you
wish to temporarily remove a destination from the stored addresses,
open the detail confirmation screen and remove the destination in
the screen.
USING A TRANSMISSION LOG TO RESEND
(factory default setting),the image is
only sent to those destinations among the destinations that are
set to [Set as Default used] which are for the currently selected mode. If
the checkmark is removed
 , the image can also be sent to destinations
of other modes.
, the image can also be sent to destinations
of other modes.Place the original.
Place the original in the document feeder tray of the automatic document feeder, or on the document glass.Specify all destinations.
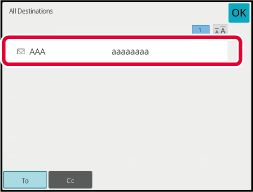
RETRIEVING A DESTINATION FROM AN ADDRESS BOOK before specifying the next destination.Tap [Address Review] on the action panel.
Confirm the destination.
Tap the [B/W Start] or [Color Start] key ([Start] key in normal mode) to start scanning of the original.
This section explains settings you should
bear in mind if multiple types of addresses are included in a broadcast transmission.
When a broadcast transmission includes a mix of several types
of addresses (such as scan mode and Internet Fax mode destinations),
its settings are enabled for all addresses regardless of which mode
screen is used to configure them. Note the following exceptions:
When Internet
Fax addresses are not include
| File format (file compression mode) |
The compression mode set with [System Settings] → [Image Send Settings] → [Scan Settings] → [Condition Settings] → [Compression Mode at Broadcasting] in "Settings (administrator)" is used for all destinations. |
|---|---|
| Color Mode |
When the color mode setting is [Full Color] in scan mode, the image will be sent in Mono2 to fax addresses and in color to scan addresses. To send the image in Mono2 to all addresses, tap [Send Same Image as Fax Address] on the action panel in normal mode |
| Original Count |
An address of a mode in which the number of original sheets are specified, if it exists, is enabled. |
| Scan file size |
If a broadcast transmission is performed that includes destinations for which an attachment size limit has been set using [Maximum Size of Send Data (E-Mail)] or [Maximum Size of Send Data (FTP/Desktop/Network Folder)] (in "Settings (administrator)", select [System Settings] → [Image Send Settings] → [Scan Settings] → [Condition Settings]), the limit will also apply to destinations for which a limit is not set. |
| N-Up |
This mode is available only for Fax. It is linked to a mode with an appropriate function. |
| Drop Out color |
This mode is available for Scanner and Data entry. It is linked to a mode with an appropriate function. |
| RGB |
This mode is available for Scanner, Network Folder, and FTP/Desktop. It is linked to a mode with an appropriate function. |
When Internet
Fax addresses are included
When Internet Fax addresses are included in the destinations,
the following restrictions apply.
| Color Mode |
Fixed at black & white binary. |
|---|---|
| File format (file compression mode) |
Fixed at TIFF. |
| Original |
Transmission will take place to all addresses using the same image width as Internet Fax. |
| Background Adjustment |
Cannot be set. |
| Blank Page Skip | |
| Drop Out color | |
| Contrast | |
| Sharpness | |
| RGB | |
| Sign | |
| Encrypt | |
| Multicrop | |
| Business Card Scan | |
| Image Crop |
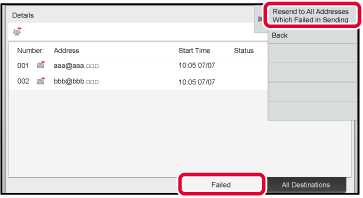
The results of a completed broadcast transmission
can be checked in the job status screen. If transmission to any
of the destinations failed, resend the image to those destinations.
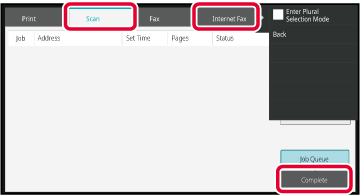
Tap the job status display.
Tap the [Scan] tab or [Internet Fax] tab, and tap the [Complete] key.
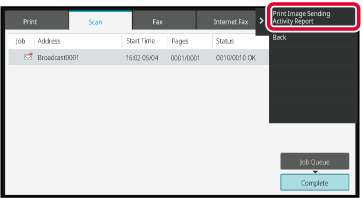
After tapping the key of the completed broadcast transmission, tap [Check Details of Selected Job] on the action panel.
After tapping the [Failed] tab, tap [Resend to All Addresses Which Failed in Sending] on the action panel to resend the image.
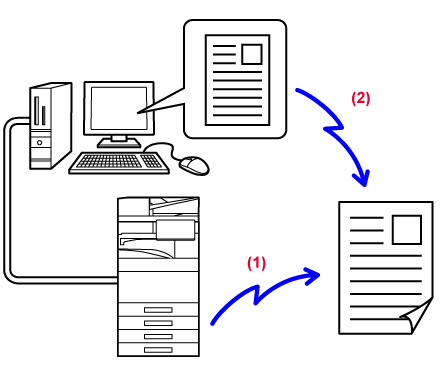
A file on a computer can
be sent via the machine as a fax (PC-I Fax function).
Faxes are sent using the PC-I Fax function in the same way
that documents are printed. Select the PC-Fax driver as the printer
driver for your computer and then select the Print command in the
application. Image data for transmission will be created and sent
as an Internet fax.
By using the "Log Viewer" application, Internet faxes can
be sent using the transmission log displayed in the Log Viewer.
For the procedures for using this function, see the PC-Fax
driver Help.
Version 06a / bp70c65_usr_06a_us
