Storing scanned originals
in machine's memory before transmitting them is called "Memory TX".
This section explains how to scan the original through the
automatic document feeder and send the data by the memory transmission
function.
- To fax a thick original or other
original that cannot be placed in the automatic document feeder,
open the automatic document feeder and place the original on the
document glass.
- If there is a fax job in progress when
the transmission operation is performed, the fax is transmitted
when the job in progress is finished.
- If the memory becomes full while the originals
are being scanned, a message will appear and scanning will stop.
When Quick On Line Sending is enabled for transmission, the scanned
originals are sent.
- To
disable the Quick On Line Sending setting:
In "Settings
(administrator)", select [System Settings] → [Image Send Settings] → [Fax Settings]
→ [Send Settings] → [Quick On Line Sending].
If you
disable this setting, memory transmission will not begin until all
pages have been scanned.
- To set the
scan complete sound:
In "Settings
(administrator)", select [System Settings] → [Common Settings] → [Sound Settings]
→ [Beep Sound Settings (Common)] → [Scan Complete Sound (Image Send)].
- Always stamp
scanned originals:
In "Settings
(administrator)", select [System Settings] → [Image Send Settings] → [Common Settings]
→ [Condition Settings] → [Default Verification Stamp]. When this is enabled, originals
are
always stamped without the need to select “Verification Stamp”.
- To disable
the Disabling of Document Feeder setting:
In "Settings
(administrator)", select [System Settings] → [Common Settings] →
[Device Control] → [Condition Settings] or [Enable/Disable Settings]
→ [Disabling of Document Feeder].
Place the original in the document feeder tray of the
automatic document feeder.
AUTOMATIC DOCUMENT FEEDERSpecify the destination fax number.
Tap the [Start] key to begin transmission.
When scanning is completed, the machine beeps.
- Tap
the [Preview] key to check the preview of an image before sending
a fax. For more information, see "
FAX TRANSMISSION METHODS".
- When all
originals have been scanned, "Job stored." will be displayed together
with a job control number. This number is recorded in the transaction
report and image sending activity report and can be used to check
fax jobs.
PRINTING IMAGE SENDING ACTIVITY REPORTS
To
cancel scanning the original:
Tap the [Cancel Scan] key.
Sending a scanned original without saving
it in the machine's memory is called "Direct TX".
This section explains how to scan the original through the
automatic document feeder and directly send it.
To fax a thick original or other original that
cannot be placed in the automatic document feeder, open the automatic
document feeder and place the original on the document glass.
- The following functions
cannot be used with direct transmission:
Timer
Transmission, N-Up, Card Shot, Job Build, Polling Memory, Original
Count, File, Quick File, Memory Box, Book Divide, Poling, 2-Sided
Scan, Search Global Address Book
- Resending will not take
place when a direct transmission is not successful due to a communication
error or other reason.
- If a fax transmission is
already in progress when the direct transmission operation is performed,
the direct transmission will wait until the previous transmission
is finished. When the previous transmission is completed, the direct
transmission will begin.
- While the direct transmission
is waiting, the job status display can be tapped to display the
job status screen. No other operations are possible.
FAX JOBS
- The [Preview] key cannot
be used for transmission.
- To disable the Disabling
of Document Feeder setting:.
In "Settings
(administrator)", select [System Settings] → [Common Settings] →
[Device Control] → [Condition Settings] or [Enable/Disable Settings]
→ [Disabling of Document Feeder].
Tap the [Detail] key to change to normal mode.
EASY MODEPlace the original in the document feeder tray of the
automatic document feeder.
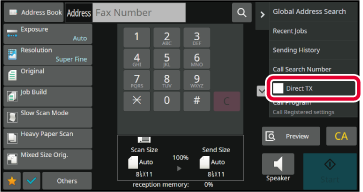
AUTOMATIC DOCUMENT FEEDERSpecify the destination fax number, and tap [Direct TX]
on the action panel.
Specify the destination fax number.
- Only one destination can be specified.
A one-touch key in which multiple destinations are stored cannot
be used.
- The destination cannot be retrieved from
a global address book.
Tap the [Start] key to begin transmission.
If a fax transmission is already in progress when
the direct transmission operation is performed, the direct transmission will
wait until the previous transmission is finished. When the previous
transmission is completed, the direct transmission will begin.
While the direct transmission is waiting, you can only
check the job status.
JOB
STATUSTo
cancel scanning the original:
Tap the [Cancel Scan] key.
Storing scanned originals in machine's memory before transmitting
them is called "Memory TX".
This section explains how to scan the original placed on the
document glass and send the data by the memory transmission function.
- If a fax is being received when the
transmission operation is performed, the transmission will be reserved
and transmission will take place after fax reception is completed.
- If the memory becomes full while the originals
are being scanned, a message will appear and transmission will be canceled.
Caution
Do not place any objects under the original size
detector. Closing the automatic document feeder with an object underneath may
damage the original size detector plate and prevent correct detection
of the document size.
Place the original on the document glass.
EASY MODEWhen faxing a multi-page original, scan each page
in order starting from the first page.
Specify the destination fax number.
Tap the [Start] key to begin transmission.
When scanning is completed, the machine beeps.
If you have another page to scan, change pages and then
tap the [Start] key.
Repeat until all originals have been scanned.
If no action is taken for one minute, scanning
automatically ends and the transmission is reserved.
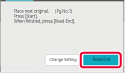
Tap the [Read-End] key.
A beep sounds.
Open the automatic document feeder and remove the original.
To
cancel scanning:
Tap the [CA] key before the [Read-End] key
is tapped.
- When all originals
have been scanned, "Job stored." will be displayed together with
a job control number.
This number
can be used to locate the job in the Transaction Report or in the
Image Sending Activity Report.
PRINTING IMAGE SENDING ACTIVITY REPORTS
- If no action is taken for one minute after
the confirmation screen is displayed, scanning automatically ends
and the transmission is reserved.
- The [Change Setting] key can be tapped, if
necessary, to change the exposure, resolution, scan size, and send
size for each original page scanned. However, when "N-Up"
or "Card Shot" is selected in Others, only the exposure can be changed
when scanning an even-numbered original page.
To
cancel transmission:
Tap the [CA] key before the [Read-End] key
is tapped.
Sending a scanned original without saving
it in the machine's memory is called "Direct TX".
This section explains how to scan the original placed on the
document glass and directly send data.
When sending a fax from the document glass in direct transmission
mode, only one page can be transmitted.
- The
following functions cannot be used with direct transmission:
Timer
Transmission, N-Up, Card Shot, Job Build, Polling Memory, Original
Count, File, Quick File, Memory Box, Book Divide, Poling, 2-Sided
Scan, Search Global Address Book
- Resending will not take place when a direct
transmission is not successful due to a communication error or other
reason.
- If a fax transmission is already in progress
when the direct transmission operation is performed, the direct
transmission will wait until the previous transmission is finished.
When the previous transmission is completed, the direct transmission
will begin.
- While the direct transmission is waiting,
the job status display can be tapped to display the job status screen.
No other operations are possible.
FAX JOBS
- The [Preview] key cannot be used for
transmission.
Caution
Do not place any objects under the original size
detector. Closing the automatic document feeder with an object underneath may
damage the original size detector plate and prevent correct detection
of the document size.
Tap the [Detail] key to change to normal mode.
CHANGING MODESPlace the original on the document glass.
DOCUMENT GLASSWhen faxing a multi-page original, scan each page
in order starting from the first page.
Specify the destination fax number, and tap [Direct TX]
on the action panel.
Specify the destination fax number.
- Only one destination can be specified.
A one-touch key in which multiple destinations are stored cannot
be used.
- The destination cannot be retrieved from
a global address book.
Tap the [Start] key to begin transmission.
When the line has been connected to the destination,
scanning of the original starts.
If a fax transmission is already in progress when
the direct transmission operation is performed, the direct transmission will
wait until the previous transmission is finished. When the previous
transmission is completed, the direct transmission will begin.
While the direct transmission is waiting, you can only
check the job status.
JOB
STATUSTo
cancel scanning the original:
Tap the [Cancel Scan] key.
When the speaker is used to dial, the fax
is sent after the number is dialed and the connection is established.
- If a person answers, you will be
able to hear his or her voice, but you will not be able to speak.
- When the speaker is used, transmission
takes place without scanning the original into memory.
- A destination that includes an F-code (sub-address
and passcode) cannot be used.
- A one-touch key that has multiple destinations
or has a non-fax destination cannot be used.
- In speaker mode, the [Preview] key cannot
be used for transmission.
Tap the [Detail] key to switch to the normal mode.
EASY MODEPlace the original.
Place the original in the document feeder tray of the
automatic document feeder, or on the document glass.
AUTOMATIC DOCUMENT FEEDER
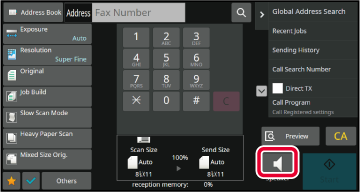
DOCUMENT GLASSTap the [Speaker] key.
When the connection is established, you will hear the
dial tone through the machine's speaker.
Tapping

allows you to use the slider or

keys to adjust the volume of the speaker.
Specify the destination fax number.
A one-touch key in which multiple destinations
are stored cannot be used
When the connection is made, tap the [Start] key
to begin transmission.
To
cancel transmission:
To stop transmission, tap the [Sending canceled] key. To stop
communication, tap the [Speaker] key.
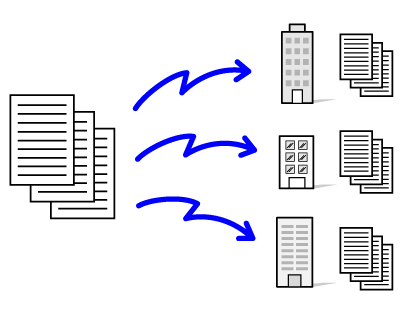
You can send a fax to multiple
destinations in a single operation when, for example, sending a
report to branch offices in different regions. This function is
called "Broadcasting".
One operation allows you to send data to up to 500 destinations,
including the reserved send jobs. (For example, if broadcast transmission
jobs with 450 destinations are already reserved, data can be broadcasted
to up to 50 destinations.)
It is convenient to store destinations you frequently
use for broadcast transmission as contacts or groups. A maximum
of 500 destinations can be stored in one contact.
For broadcast transmission, the contact or group key can be
simply tapped to retrieve multiple fax numbers.
You can also send faxes with the one-touch key by setting
the [Set as Default used] checkbox to
 when addresses are registered. If you
wish to temporarily remove a destination from the stored addresses,
open the detail confirmation screen and remove the destination in
the screen.
when addresses are registered. If you
wish to temporarily remove a destination from the stored addresses,
open the detail confirmation screen and remove the destination in
the screen.
ADDRESS BOOK
STORING ADDRESSES THROUGH DIRECT ENTRY
STORING ADDRESSES THROUGH GLOBAL ADDRESS SEARCH
STORING ADDRESSES FROM FAX OR IMAGE SEND LOGS
STORING GROUPS
When the checkbox of "Settings (administrator)"
-[System Settings] → [Image Send Settings] → [Common Settings] → [Default Settings]
→[Address Book Default Selection]
→ [Apply Addresses of Sending Modes Only] is selected

(factory default setting), the fax is
only sent to those destinations that are for fax among the destinations
that are set to [Set as Default used]. If the checkmark is removed

, the fax can be sent to destinations
of other modes.
When a one-touch key is used to dial, the number of
fax numbers that are dialed is the number of destinations that
are stored in the one-touch key. When a one-touch key that has 10
destinations is used, 10 fax numbers are dialed.
Broadcast transmission is available
only for memory transmission.
If this function is combined with "Timer
Transmission", broadcast transmission can be performed at any time,
such as at night.
A broadcast transmission can also be used in combination with other
convenient functions.
Even if a color original is being
used, it will be sent to fax and Internet fax destinations in black
and white. A long original is also sent in black and white.
If you wish to send the same image as fax
to all destinations, tap [Send Same Image as Fax Address] on the action panel.
When Scan to E-mail and Internet Fax destinations
are included, the send width for Scan to E-mail and Internet Fax
will be the same as the send width for fax.
Direct SMTP addresses cannot be included
in a transmission.
Place the original.
Place the original in the document feeder tray of the
automatic document feeder, or on the document glass.
AUTOMATIC DOCUMENT FEEDER
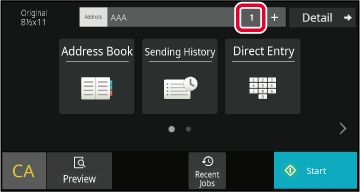
DOCUMENT GLASSSpecify all destinations.
After entering a destination using the numeric keys, if you wish
to enter another destination using the numeric keys, tap

before entering the next destination.
can be omitted before or after a destination
entered using a one-touch key.
If "Be sure to press Next Address Key ([+]) before selecting the next address." is
enabled in setting mode, tap
before specifying the next destination.
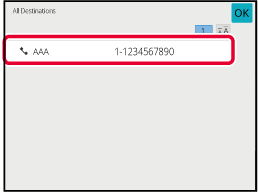
Tap the [All Destinations] key.
Confirm the destination.
To
cancel a specified destination:
Select the address you want to cancel in the address
list screen, and tap the [Delete] key.
Tap the [Start] key to start scanning of the original.
- If you inserted
the original pages in the document feeder tray, all pages are scanned.
A beep will sound to indicate that scanning
and transmission have ended.
- When you place the original
on the document glass, scan each page one at a time.
When scanning finishes, place the next
original and tap the [Start] key.
Repeat the procedure until all pages have
been scanned and then tap the [Read-End] key.
A beep will sound to indicate that scanning
and transmission have ended.
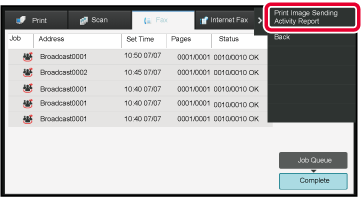
The results of a completed broadcast transmission
can be checked in the job status screen. If transmission to any
of the destinations failed, resend the fax to those destinations.
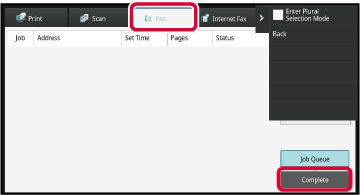
Tap the job status display, and tapping the [Fax]
tab.
Tap the [Complete] key.
After tapping the key of the completed broadcast transmission,
tap [Check Details of Selected Job] on the action panel.
If the broadcast transmission included destinations
of different modes, the same broadcast transmission key will appear in
each of those modes.
After tapping the [Failed] tab, tap [Resend to All Addresses Which Failed in Sending]
on the action panel to resend the image.
The steps to follow after [Resend to All Addresses Which Failed in Sending] is tapped
differ depending on whether or not the document filing function
is used.
- Using document
filing:
You will
return to the document filing resend screen with the unsuccessful
destinations entered. Perform the document filing resend procedure.
(There is no need to re-scan the original.)
If the
job was stored in a confidential folder or was stored as confidential
file, a password entry screen will appear after you tap the [Retry]
key. Enter the password.
- Not using
document filing:
You will
return to the base screen with the unsuccessful destinations entered.
Place the original and perform the steps of the broadcast transmission.
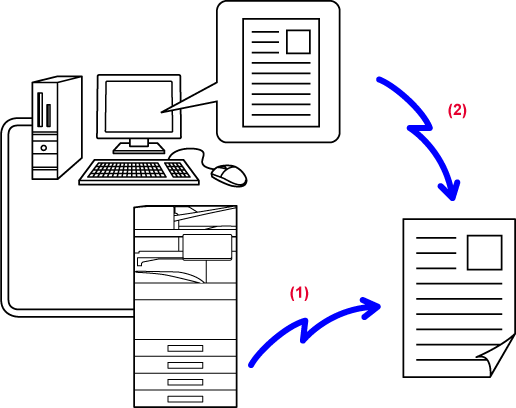
A file on a computer can
be sent via the machine as a fax (PC-Fax function). Faxes are sent
using the PC-Fax function in the same way that documents are printed.
Select the PC-Fax driver as the printer driver for your computer
and then select the Print command in the application. Image data
for transmission will be created and sent as a fax.
By using the "Log Viewer" application, faxes can be sent using
the transmission log displayed in the Log Viewer.
- PC-I-Fax Send
- Log Viewer
-
Re-send faxes using
the transmission log
For the procedures for using this function, see the
PC-Fax driver Help.
- To use the PC-Fax function, the PC-Fax
driver must be installed. For more information, see the Software
Setup Guide.
- This function can only be used on a Windows®
computer.
Only transmission is available for this function.
Faxes cannot be received by your computer.