Your sender information
(date, time, sender name, sender address, number of pages) is automatically
added to the top of the file you transmit.
-s.png)
A transaction report is automatically printed
out to alert you when an Internet fax transmission fails or when
a broadcast transmission is performed.
The transaction report contains a description of the transmission
(date, start time, name of destination, time required, number of
pages, result, etc.).
INFORMATION APPEARING IN THE RESULT COLUMN
Transaction reports are printed based on conditions set in
the setting mode. Select different conditions for a transmission
as required.
Place the original.
Place the original in the document feeder tray of the automatic document feeder, or on the document glass.Tap the mode display to switch to the initial screen of Internet Fax mode.
CHANGING MODESSpecify the destination.
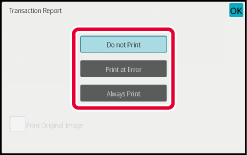
RETRIEVING A DESTINATION FROM AN ADDRESS BOOKTap the [Others] key, and tap the [Transaction Report] key.
Tap the key of the print settings.
After the settings are completed, tap and [Back] keys in sequence.
 to include part of the transmitted original
in the transaction report.
to include part of the transmitted original
in the transaction report.Tap the [Start] key to start scanning of the original.
When [Print Original Image] is enabled, the first page of the
transmitted original is printed on the same sheet as the transaction
report. The original image is reduced to allow it to fit on the
sheet. If the vertical scanning length (X direction) of the original
is longer than 17-1/64" (432 mm), the part that exceeds 17-1/64"
(432 mm) may be cut off.
Specify a time at which
a transmission or broadcast transmission will automatically take
place. Transmission begins automatically at the specified time.
This function is helpful when you wish to perform reserved,
broadcast or other transmissions during your absence or at night
or other times when telephone rates are low.
In fax mode, a timer setting can also be specified for polling
reception to receive a fax when you are not present.
For example, if it is set to print data received during the
day at 20:00, the received data will not be printed immediately, and
printing will begin automatically at 20:00.
.png)
 " position. If the main power switch is
in the “
 "position at the specified time, transmission
will not take place.
"position at the specified time, transmission
will not take place.Place the original.
When in fax mode, then after completing this procedure, proceed to Step 3.Tap the mode display to switch to the initial screen of each mode.
CHANGING MODESSpecify the destination.
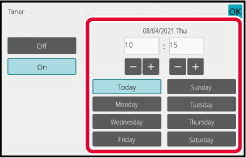
RETRIEVING A DESTINATION FROM AN ADDRESS BOOKTap the [Others] key, and tap the [Timer] key.
Tap [On] key.
Specify the date.

Specify the time (hour and minute) in 24-hour format.
After the settings are completed, tap and [Back] keys in sequence.
 to finely adjust the time.
Tap the [Start] key to start scanning of the original.
You can add a signature when sending a scanned
image. This allows the recipient to check your sender information
in the electronic signature.
Place the original.
Place the original in the document feeder tray of the automatic document feeder, or on the document glass.Tap the mode display to switch to the initial screen of E-mail mode.
CHANGING MODESSpecify the destination.
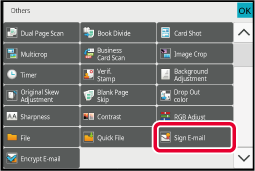
RETRIEVING A DESTINATION FROM AN ADDRESS BOOKTap the [Others] key, and tap the [Sign E-mail] key.
A checkmark appears on the icon.
Tap the [Start] key to start scanning of the original.
You can encrypt the transmitted data to
strengthen security.
Place the original.
Place the original in the document feeder tray of the automatic document feeder, or on the document glass.Tap the mode display to switch to the initial screen of E-mail mode.
CHANGING MODESSpecify the destination.
RETRIEVING A DESTINATION FROM AN ADDRESS BOOK ) in "Settings (administrator)" - [System Settings]
→ [Security Settings] → [S/MIME Settings] → [Condition Settings] → [Encryption Settings],
addresses
without a user certificate cannot be selected. When the checkmark
is removed (
 ), the data is sent without encryption.
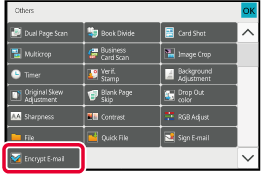
Tap the [Others] key, and tap the [Encrypt E-mail] key.
A checkmark appears on the icon.
Tap the [Start] key to start scanning of the original.
Version 06a / bp70c65_usr_06a_us