IMAGE SEND SEQUENCE
First, to place the machine in a desired image send
mode, tap the appropriate icon in the Home screen.
CHANGING MODES
Place the original.
Place the original in the document feeder tray of the automatic
document feeder, or on the document glass.
AUTOMATIC DOCUMENT FEEDER
DOCUMENT GLASS
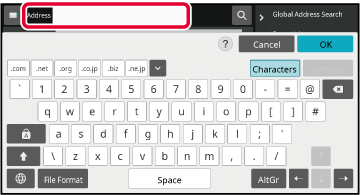
Enter the destination.
Tap the address key to directly enter the destination,
or search and retrieve the address book or destination.
In Normal mode
ENTERING AN ADDRESS MANUALLY
RETRIEVING A DESTINATION FROM AN ADDRESS BOOK
USING A SEARCH NUMBER TO RETRIEVE A DESTINATION
RETRIEVING A DESTINATION FROM A GLOBAL ADDRESS BOOK
RETRIEVING A DESTINATION FROM A MOBILE ADDRESS BOOK
USING A TRANSMISSION LOG TO RESEND
VIEWING A LIST OF THE SELECTED DESTINATIONS
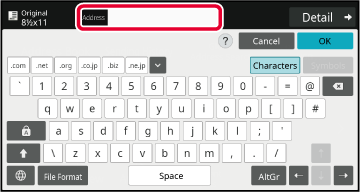
SPECIFYING A NETWORK FOLDERIn Easy mode
ENTERING AN ADDRESS MANUALLY
RETRIEVING A DESTINATION FROM AN ADDRESS BOOK
USING A TRANSMISSION LOG TO RESEND
RETRIEVING A DESTINATION FROM A GLOBAL ADDRESS BOOK
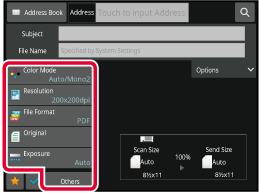
RETRIEVING A DESTINATION FROM A MOBILE ADDRESS BOOKSelect functions.
Specify the original scan size, exposure, file format,
and other items.
If necessary, you can refer to the following functions
for the setting.
In Normal mode
SCANNING AND SENDING ORIGINALS COLLECTIVELY
ADJUSTING COLORS AND SHADING
SCANNING ORIGINALS
AUTOMATICALLY SCANNING BOTH SIDES OF AN ORIGINAL (2-SIDED ORIGINAL)
SCAN SIZE AND SEND SIZE (ENLARGE/REDUCE)
SPECIFYING THE ORIGINAL SCAN SIZE IN PAPER SIZE
SPECIFYING THE ORIGINAL SCAN SIZE USING NUMERIC VALUES
SPECIFYING THE SEND SIZE OF THE IMAGE
CHANGING THE EXPOSURE AND ORIGINAL IMAGE TYPE
CHANGING THE RESOLUTION
CHANGING FORMAT IN SCAN OR DATA ENTRY MODE
CHANGING FORMAT IN INTERNET FAX MODE
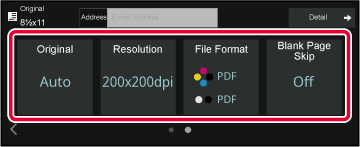
CHANGING COLOR MODEIn Easy mode
AUTOMATICALLY SCANNING BOTH SIDES OF AN ORIGINAL (2-SIDED ORIGINAL)
CHANGING THE RESOLUTION
CHANGING FORMAT IN SCAN OR DATA ENTRY MODE
ELIMINATING BLANK PAGES FROM A TRANSMISSION (BLANK PAGE SKIP)Send the original.
Tap the [B/W Start] or [Color Start]
key ([Start] key in normal mode).
- You
can tap the [Preview] key before tapping the [B/W Start]
key or the [Color Start] key (the [Start] key in
normal mode) to check a preview of the image.
- When the
original is placed on the document glass, repeat the placing original
and transmission procedures until all originals have been sent.
After scanning all originals, tap the [Read-End] key.
- In normal
mode, if you tap the [File] or [Quick File] on the action
panel before sending image, you can save the scanned original as
data.
USING DOCUMENT FILING IN EACH MODE
- When the
original is scanned while skewed, there is a function which automatically
adjusts the skew.
The automatic
skew adjustment function is enabled when enabling auto configuration
in easy mode.
In normal
mode, tap the [Others] key and then the [Original Skew Adjustment] key to
switch.
AUTOMATICALLY ADJUST SKEWED SCAN DATA (Original Skew Adjustment)
If paper
misfeeds in the automatic document feeder
2 patterns can be set.
In "Settings (administrator)", select [System Settings] → [Image Send Settings]
→ [Scan Settings] → [Condition Settings] → [Quick On Line Sending].
- If enabled
When an original misfeeds, scanning stops, and
scanned data up until that point is sent.
- If disabled
Even if an original misfeeds, scanning does
not stop, the misfed original is set again, and scanning starts
again. After all of the original has been scanned, the scanned data
is sent.
.png)