This section explains how to enter a destination from
the initial screen of easy mode.
EASY MODE
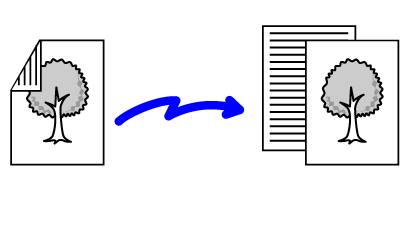
The automatic document feeder
will automatically scan both sides of the document.
For example, a 2-sided original can be scanned, and its front
and back sides can be sent as 2 pages.
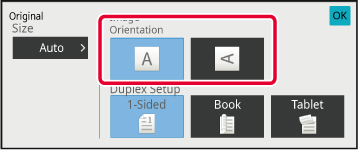
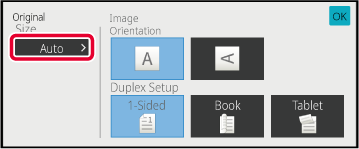
Tap the [Original] key, and tap the [Book] key or [Tablet] key.
See the figure on the left to check the binding edge of the original and select the key to be tapped.
Tap the [Image Orientation] key with the same orientation as the placed original.
If this setting is not correct, a suitable image may not be transmitted. After the settings are completed, tap .
.
When the original is placed, its size is
automatically detected.
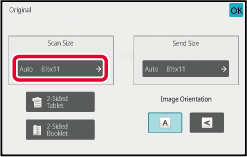
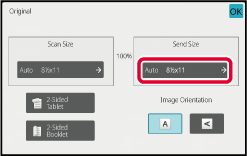
In normal mode, the size of the placed original is shown as
the "Scan Size" and the transmission size is shown as the "Send Size"
in the initial screen.
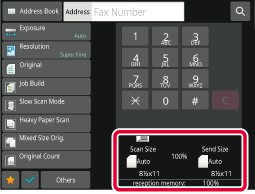
In the above screen, the scan size (the placed original)
is 8-1/2" x 11" (A4) and the send size is auto. For example, if
the scan size is 8-1/2" x 11" (A4) and the send size is 5-1/2" x
8-1/2" (B5), the image will be reduced before transmission.
When the original size is not standard (inch
size or non-standard size) or is not detected correctly, manually
specify the original size.
In Easy
mode
Tap the [Original] key.
Tap the [Auto] key.
Tap a key of the desired original size.
After the settings are completed, tap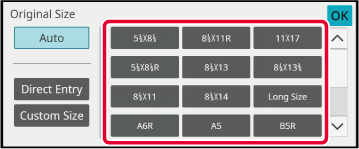
In Normal
mode
Tap the [Detail] key to change to normal mode.
EASY MODETap the [Original] key.
Tap the [Scan Size] key.
Tap the appropriate original size key.
After the settings are completed, tap.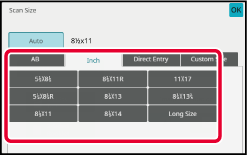
When scanning a non-standard size original
such as a postcard, specify the original size by numeric values
after placing the original. The width can be from 1" to 17" (25
mm to 432 mm), and the height can be from 1" to 11-5/8" (25 mm to
297 mm).
In Easy
mode
Tap the [Original] key.
Tap the [Auto] key.
Tap the [Direct Entry] key.
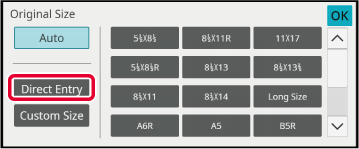
Specify the original size.
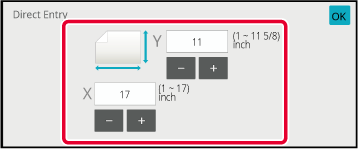
 ) to finely adjust the entered size.
Tap twice.
On the base screen, check that the specified size is displayed on the [Original] key.In Normal
mode
Tap the [Detail] key to change to normal mode.
EASY MODETap the [Original] key.
Tap the [Scan Size] key.
Tap the [Direct Entry] key, and enter the scan size.
to finely adjust the entered size.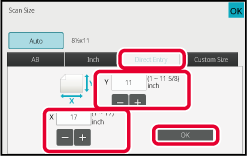
Tap the [Execute] key.
After the settings are completed, tap twice.Store the frequently used non-standard original
sizes. This section explains how to store, retrieve, change, and
delete non-standard original sizes.
Storing original sizes (Modify/Delete)
Tap the [Detail] key to change to normal mode.
EASY MODETap the [Original] key.
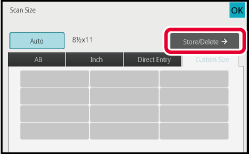
Tap the [Scan Size] key and tap the [Custom Size] tab.
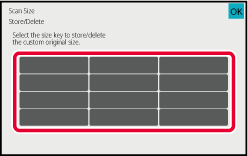
Tap [Store/Delete] key.
Tap a key (
![]() ) for storing a custom original size.
) for storing a custom original size.
 key.
key.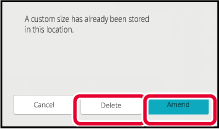
Specify the original size.
Tap the areas displaying width and height sizes respectively, and enter the sizes using the numeric keys.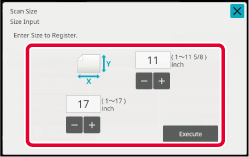 to finely adjust the entered size.
Tap the [Execute] key.
Tap the key, and check that the key of the size
stored on the Scan Size screen is added properly. After you have checked
it, tap
.Retrieving
a stored original size
In
Easy mode
Tap the [Original] key.
Tap the [Auto] key.
Tap the [Custom Size] key.
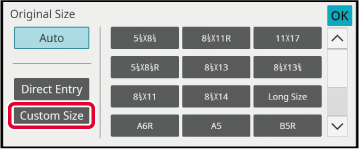
Tap the key of the original size that you wish to retrieve.
Tap twice.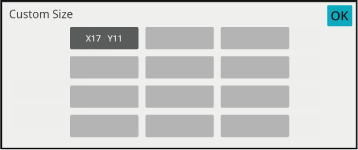
In Normal
mode
Tap the [Detail] key to change to normal mode.
EASY MODETap the [Original] key.
Tap the [Scan Size] key and tap the [Custom Size] tab.
Tap the key of the original size that you wish to retrieve.
After selecting the key of the original size, tap the key.
Check that the specified size is displayed on the scan size screen.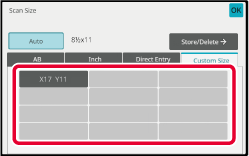
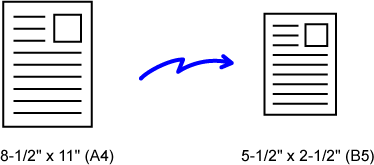
Tap this key to specify the send size as
a paper size. If the specified send size is larger than the scan
size, the image will be enlarged. If the specified send size is
smaller than the scan size, the image will be reduced.
Tap the [Detail] key to change to normal mode.
EASY MODETap the [Original] key.
Tap the [Send Size] key.
Tap the desired send size key.
After the settings are completed, tap.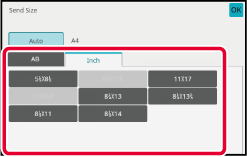
Tap the [Image Orientation] key with the same orientation as the placed original.
If this setting is not correct, a suitable image may not be transmitted..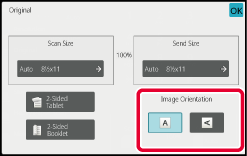
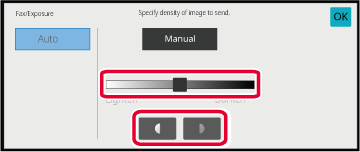
The exposure can be changed to suit the darkness of the original.
Exposure
settings
| Exposure | Suggestion | |
|---|---|---|
|
Auto |
This setting automatically adjusts the exposure for light and dark parts of the original. |
|
|
Manual |
1-2 |
Select this setting when the original consists of dark text. |
|
3 |
Select this setting for a normal original (neither dark nor light). |
|
|
4-5 |
Select this setting when the original consists of light text. |
|
After tapping the [Exposure] key, tap the [Manual] key.
Adjust the exposure with the slider or
 .
.
.
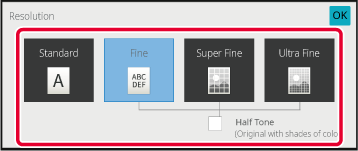
The resolution can be specified to match
the characteristics of the original, such as text or photo, the
size of the text, and the darkness of the image.
Resolution
settings
| Resolution | Suggestion |
|---|---|
|
Standard |
Select this setting when your original consists of normal-sized text (like the text in this manual). |
|
Fine |
Select this setting when your original has small text or diagrams with fine lines. The original will be scanned at twice the resolution of the [Standard] setting. |
|
Super Fine |
Select this setting when your original has intricate pictures or diagrams. A higher-quality image will be produced than with the [Fine] setting. |
|
Ultra Fine |
Select this setting when your original has intricate pictures or diagrams. This setting gives the best image quality. However, transmission will take longer than with the other settings. |
|
Half Tone |
Select this setting when your original is a photograph or has gradations of color (such as a color original). This setting will produce a clearer image than [Fine], [Super Fine], or [Ultra Fine] used alone. Halftone cannot be selected when [Standard] is used. |
Tap the [Resolution] key.
Tap the key of the desired resolution.
When your original is a photograph or has gradations of color (such as a color original), and you wish to produce a clearer image than [Fine], [Super Fine], or [Ultra Fine] used alone, set the [Half Tone] checkbox to ..
..
Version 06a / bp70c65_usr_06a_us
